




How to Create a Google Drive File Uploader in WordPress
The File Uploader widget lets your website visitors upload files directly to a Google Drive folder — straight from a form on your WordPress site. Ideal for client portals, submission forms, course assignments, and any scenario where you need to collect files from users. So let’s see how to create a Google Drive File Uploader in WordPress.
Before You Begin
- Ninja Drive is installed and activated — see Install Guide
- A Google account is connected — see Link Your Google App
- The destination Google Drive folder exists, and your connected account has write access to it
Step 1: Open the Widget Builder
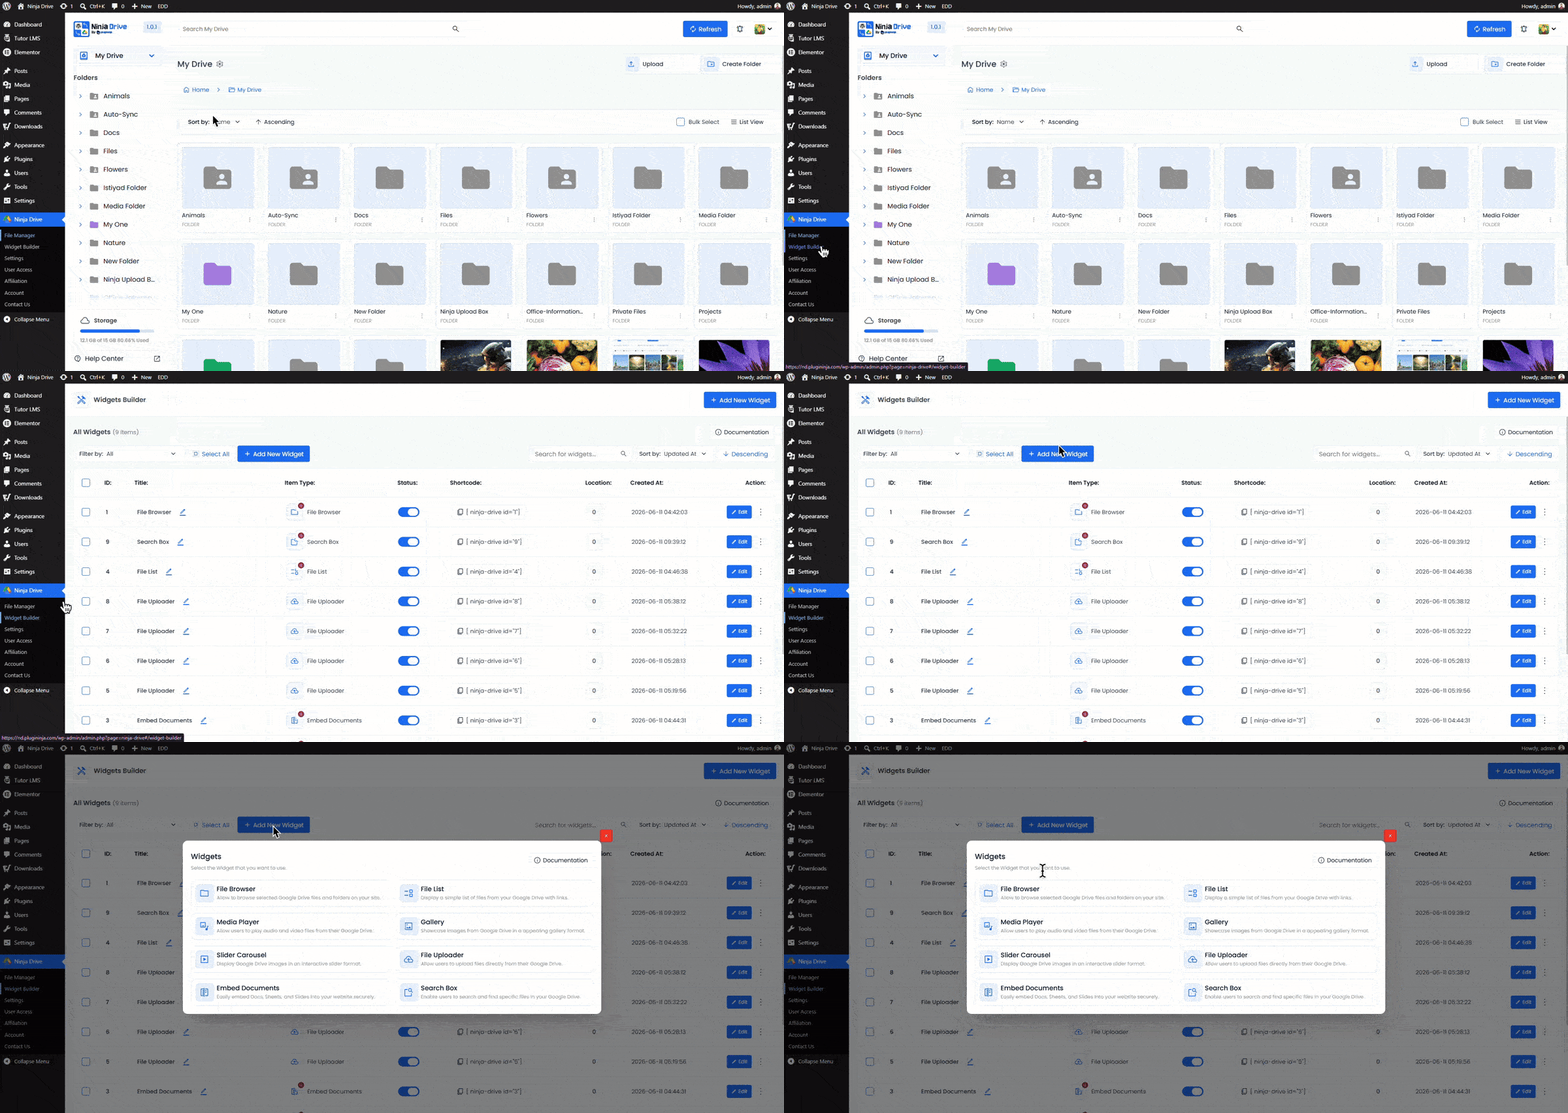
Go to Ninja Drive → Widget Builder in your WordPress dashboard.
Step 2: Add a New Widget and Select “File Uploader”
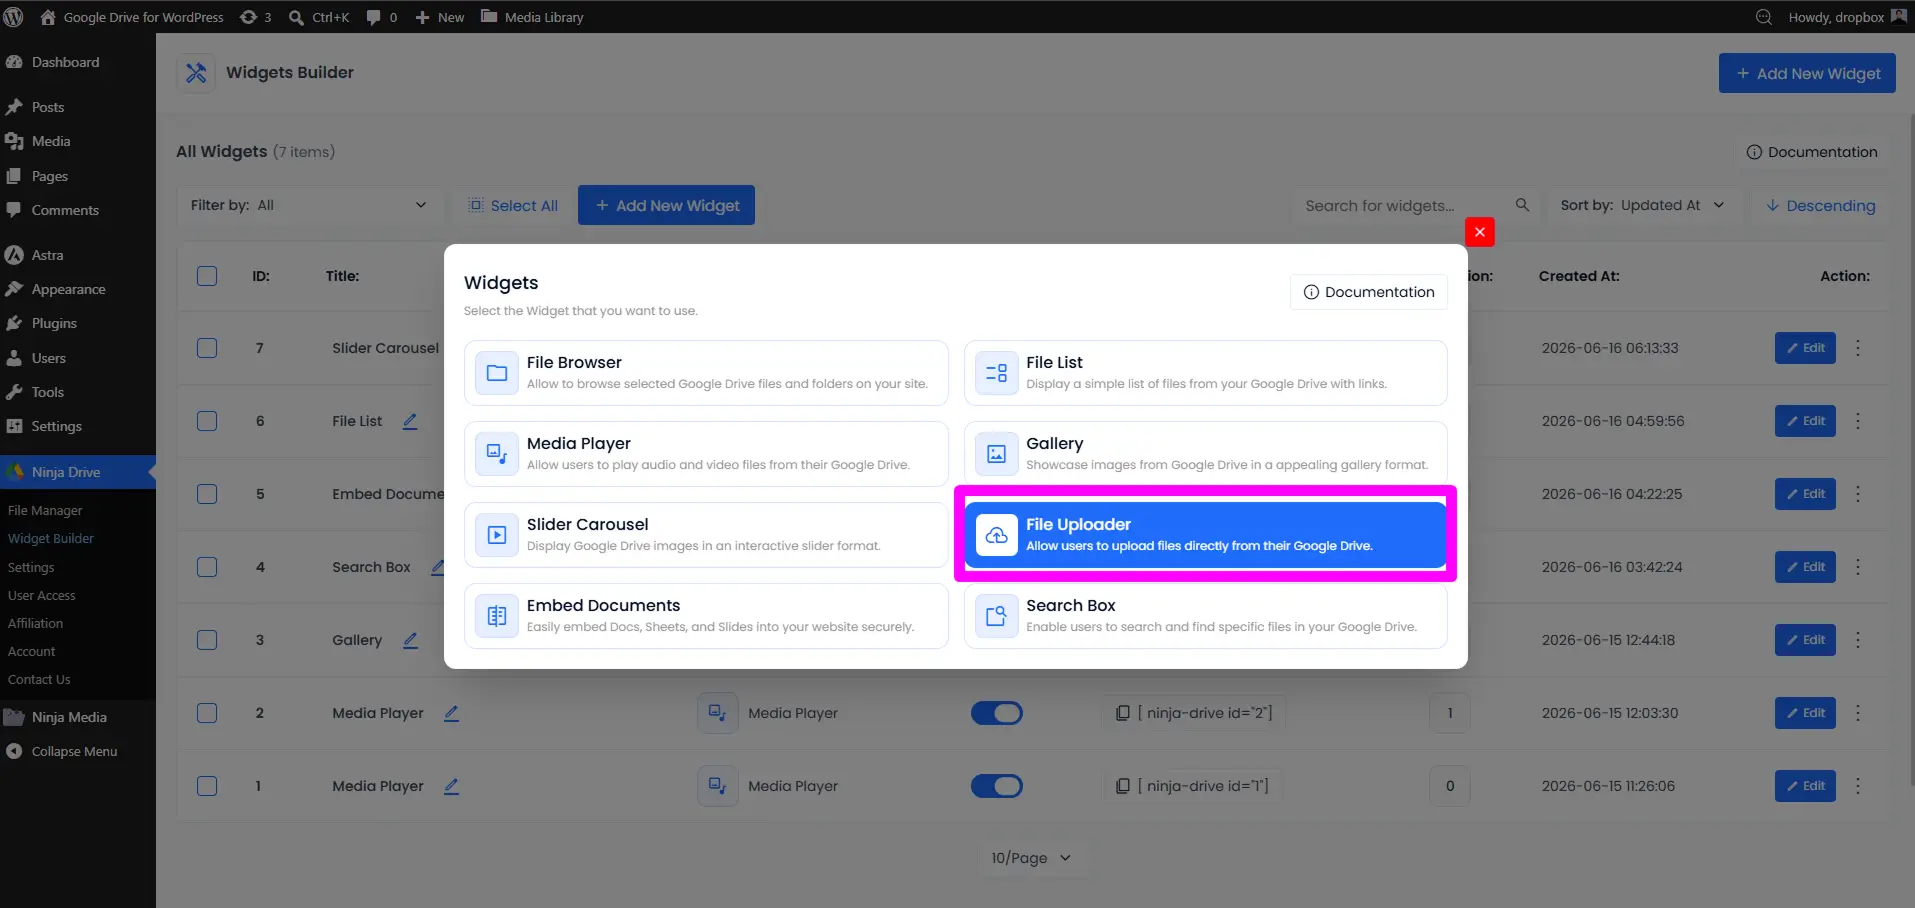
Click Add New Widget, then select File Uploader from the widget type list.
Step 3: Select Source From Google Drive (You can select only one folder)
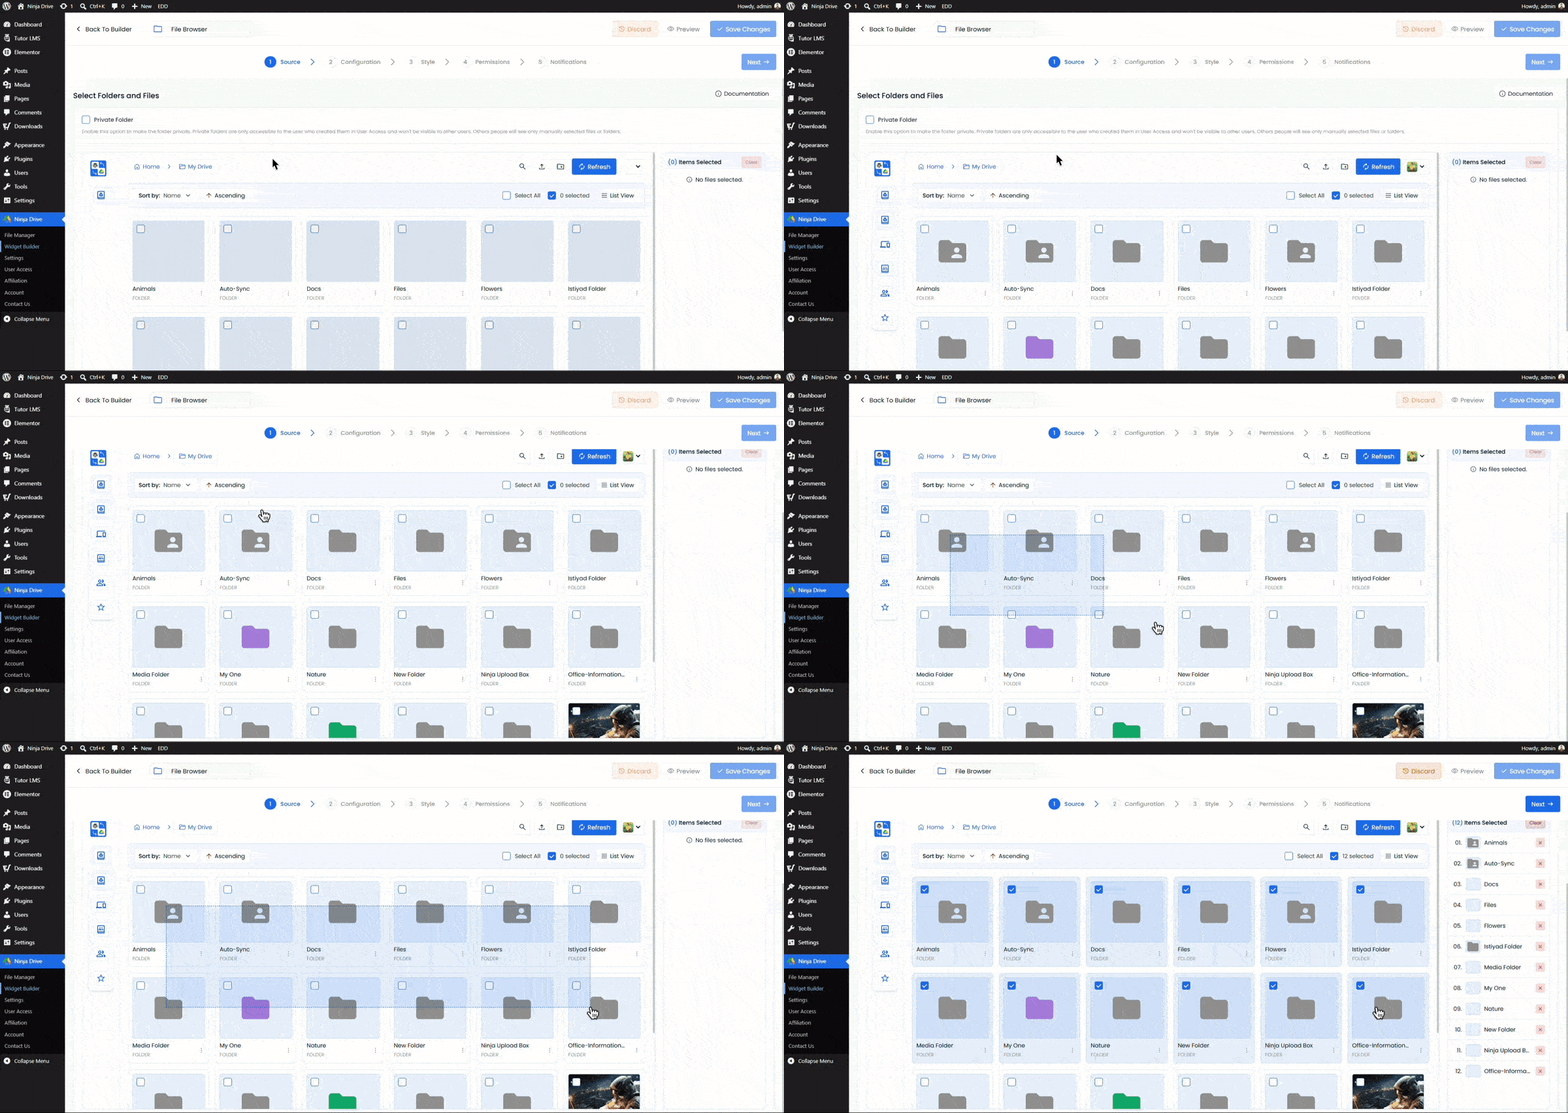
After selecting the File Uploader, you will land in the source tab. From here, select the Folder that you want to show in the File Uploader.
Step 3: Configure the File Uploader Settings
Configuration Tab
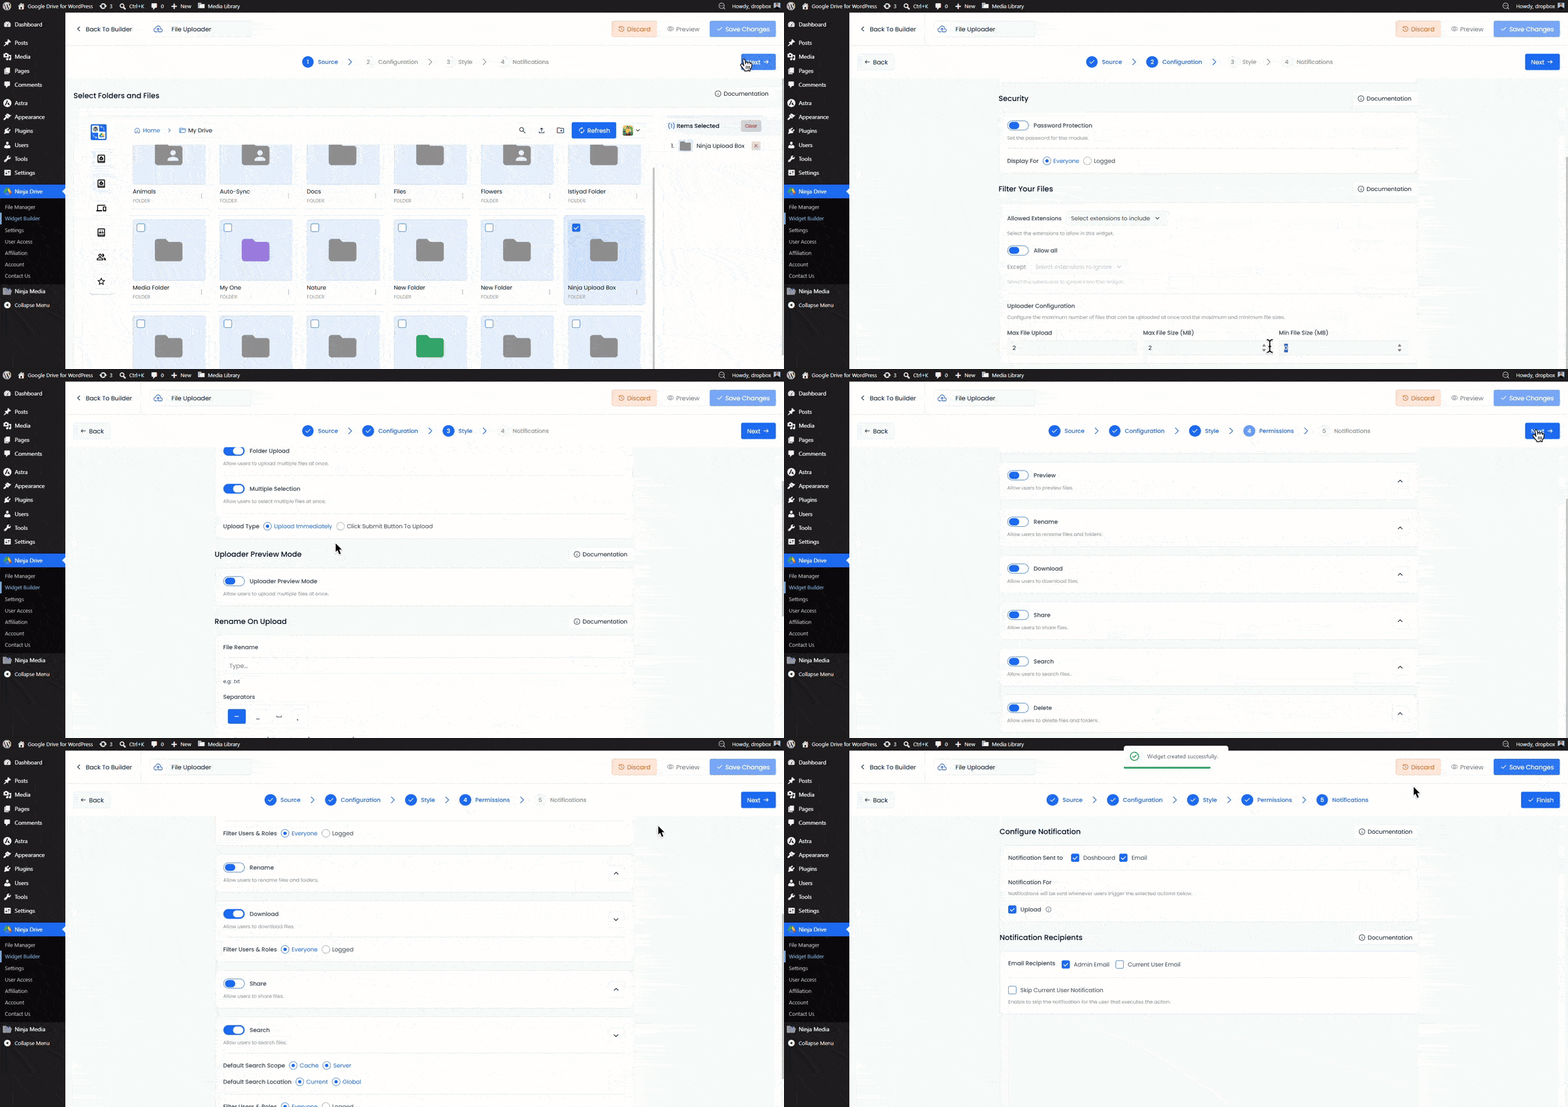
- Enable: Secure Video Playback.
- Password Protection: Set any password for the widget.
- Filter Your File: Configure the filter for your File uploader, as you can set Max file upload, Max file size, and Min file size.
Style Tab
- Upload box label: What text do you want to show in the upload box?
- Folder Upload: Enable to upload a folder.
- Multiple Selection: Enable to allow multiple file uploads
- Upload Type: How you want the upload type.
- Upload Immediately
- Click the Submit Button to Upload
- Uploader Preview mode:
- File loading type: Load more, Infinite Scroll, or Pagination.
- Default View Style: Choose your preferred gallery style from Grid or List
- File Info Display: Configure how the file list is displayed.
- Table Column Names: You can change the column name to anything you want.
- Header Options: Breadcrumb, Sorting.
- Rename on upload: You can make any type of presets to rename on upload.
- Layout: Configure the Uploader layout.
Permission Tab
- Create Folders – Allow users to create new folders directly from the file browser interface.
- Preview Files – Allow users to open and preview supported files without downloading them.
- Rename Files & Folders – Permit users to rename files and folders for better organization.
- Download Files – Allow users to download files directly to their device.
- Share Files – Enable file sharing options and generate shareable links.
- Search Files – Allow users to quickly find files and folders using the built-in search feature.
- Delete Files & Folders – Permit users to remove files and folders from the connected storage account.
Notification Tab
Notification For: Notifications will be sent whenever users trigger the selected actions below.
Step 4: Save and Copy the Shortcode
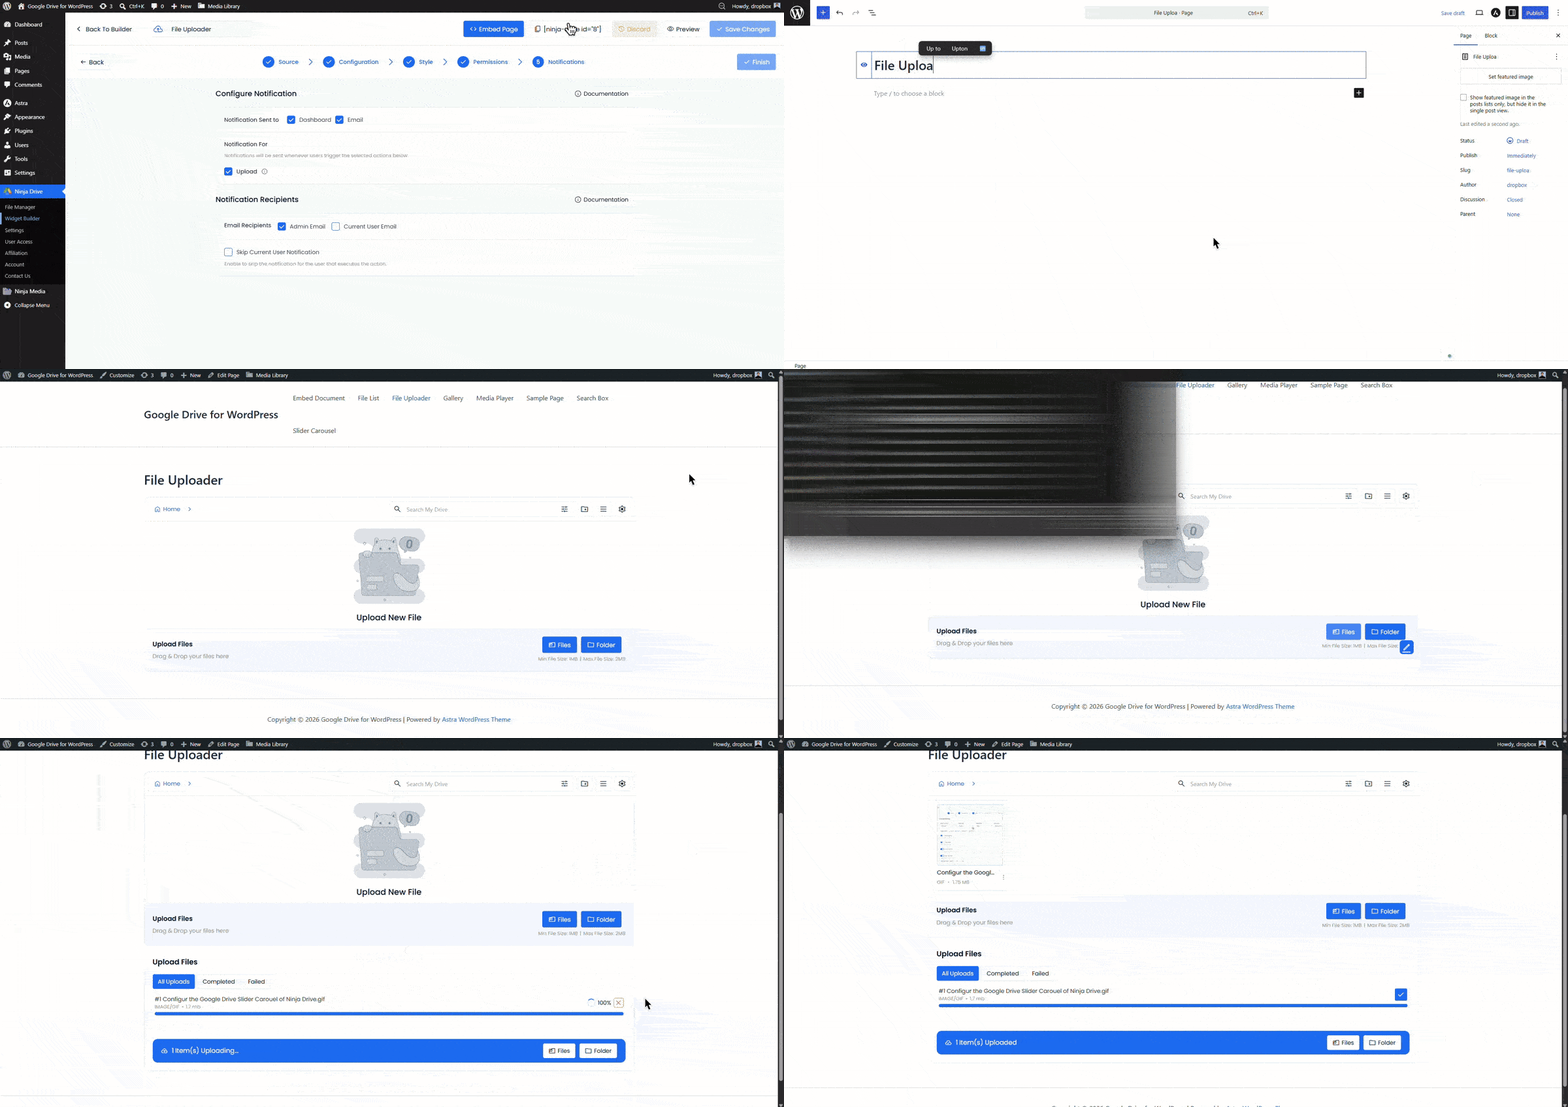
Click Save and copy the generated shortcode:
[ninja_drive id="*"]Step 5: Embed the Uploader on a Page or Post
Paste the shortcode into any page, post, or widget area using a Shortcode block (Gutenberg), the Text tab (Classic Editor), or a Shortcode widget (Elementor).

 Join Community