




How to Enable Auto Synchronization in Ninja Drive?
Keeping your Google Drive content updated manually can be time-consuming. Ninja Drive’s Auto Synchronization feature automatically detects changes in your connected Google Drive folders and keeps your WordPress content in sync without requiring manual updates.
Once configured, Ninja Drive can automatically fetch new files, updated documents, and folder changes based on your preferred synchronization schedule.
Configure Auto Synchronization
Start by enabling synchronization from the Ninja Drive settings panel.
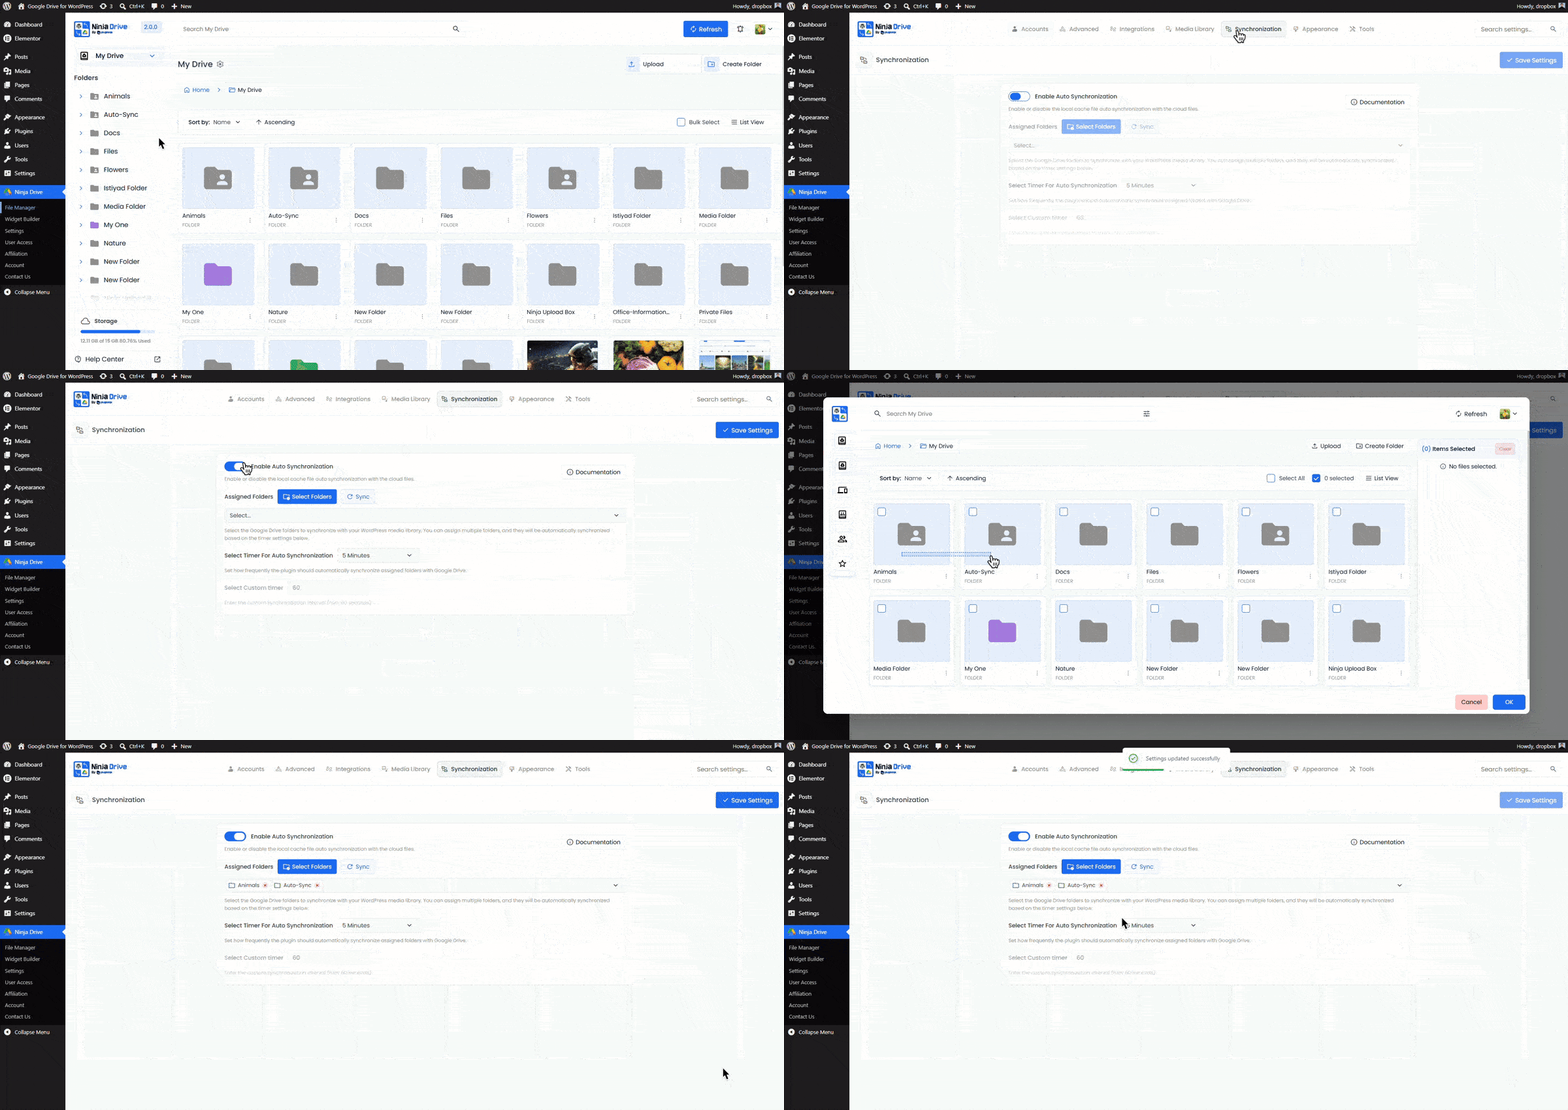
- Navigate to Ninja Drive → Settings.
- Open the Synchronization tab.
- Enable Auto Synchronization.
- Click Select Folder and choose the Google Drive folders you want to monitor.
- Select a synchronization frequency or choose Custom.
- Enter your preferred synchronization interval.
- Click Save Changes.
Important: Verify WP-Cron Is Running. Auto Synchronization relies on WordPress scheduled tasks (WP-Cron). Make sure WP-Cron is enabled and functioning properly on your website. Without it, scheduled synchronization tasks may not run as expected. If your website uses a server-level cron job instead of the default WordPress cron system, ensure it is configured correctly to execute scheduled tasks.
How Auto Synchronization Works
When a file is added, removed, renamed, or updated in your selected Google Drive folders, Ninja Drive can automatically retrieve those changes and update the connected modules on your WordPress website based on the synchronization schedule you define.
Tip: Auto Synchronization is especially useful for file browsers, galleries, media libraries, and document repositories that receive frequent updates from Google Drive.
Ready to manage and display your Google Drive files directly from WordPress? Get Started with Ninja Drive

 Join Community