





How to enable Google Drive integration for the WordPress Media library?
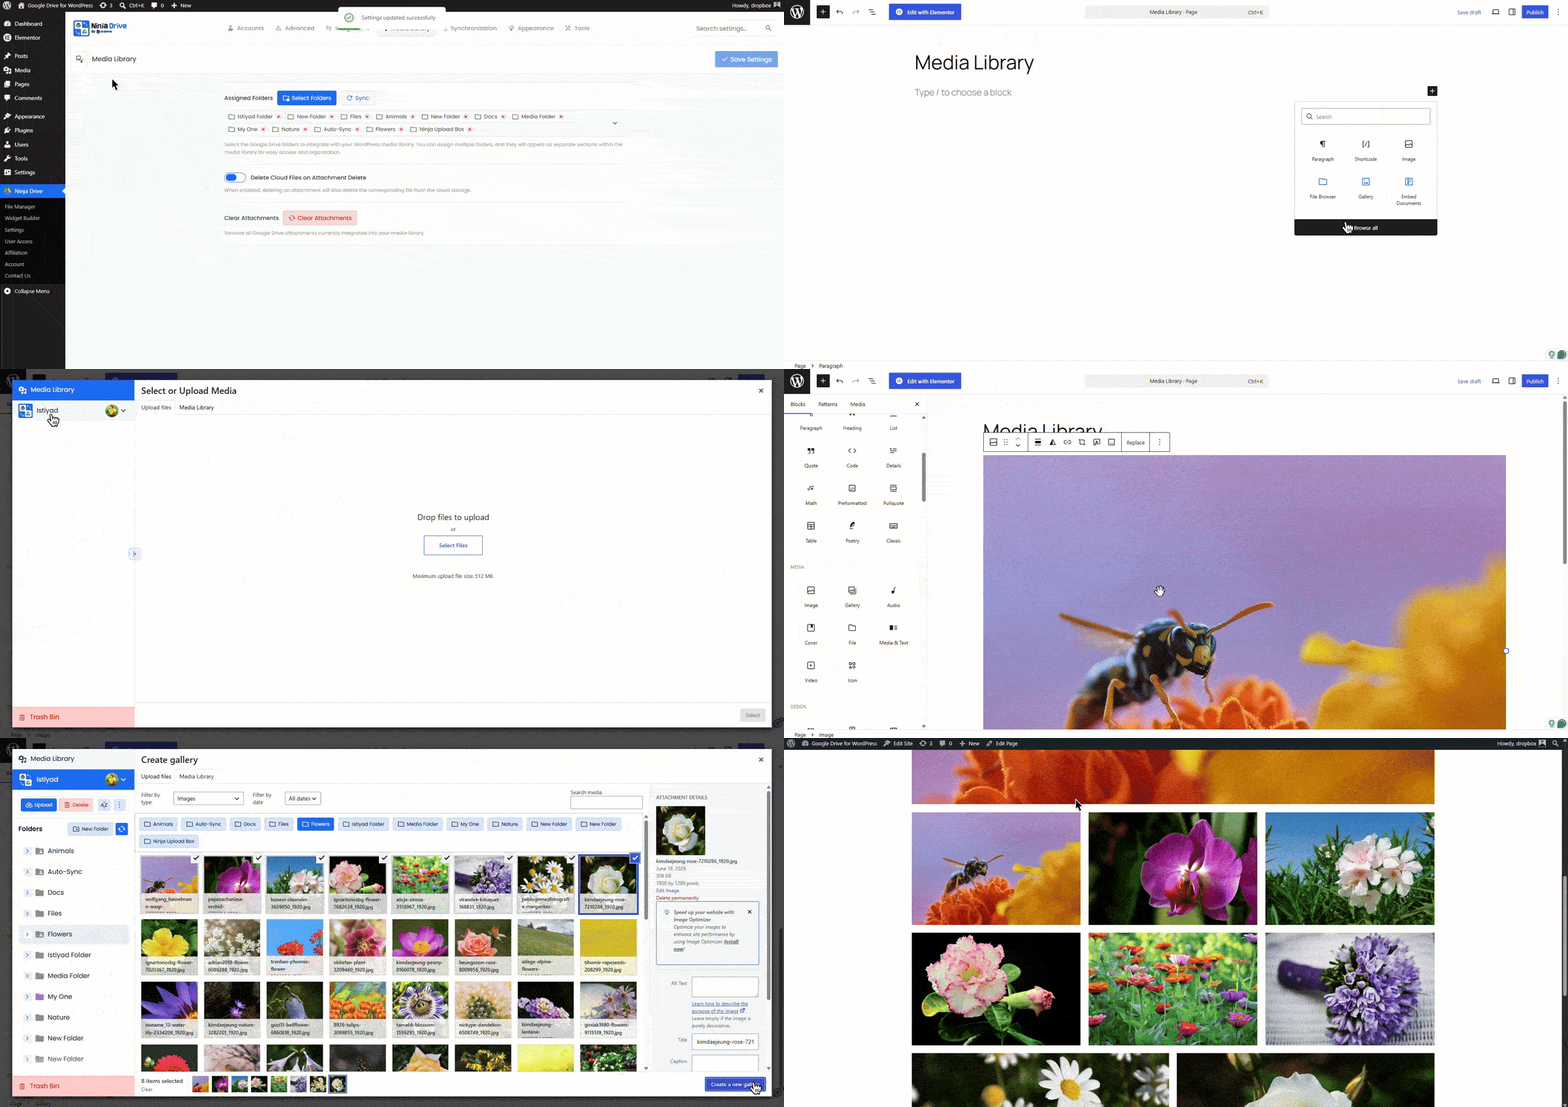
Ninja Drive’s Media Library integration connects your Google Drive directly to the WordPress media inserter — so when you click “Add Media” in any post or page, you can browse and insert Google Drive files without downloading or uploading them to your server first.
What This Feature Enables
- Browse Google Drive folders directly inside the WordPress media inserter
- Insert Google Drive images into posts and pages without uploading to your server
- Import Google Drive files to the WordPress media library permanently
- Select Drive files for use in featured images, gallery blocks, and any media input
Step 1: Enable Google Drive Media library integration in Ninja Drive
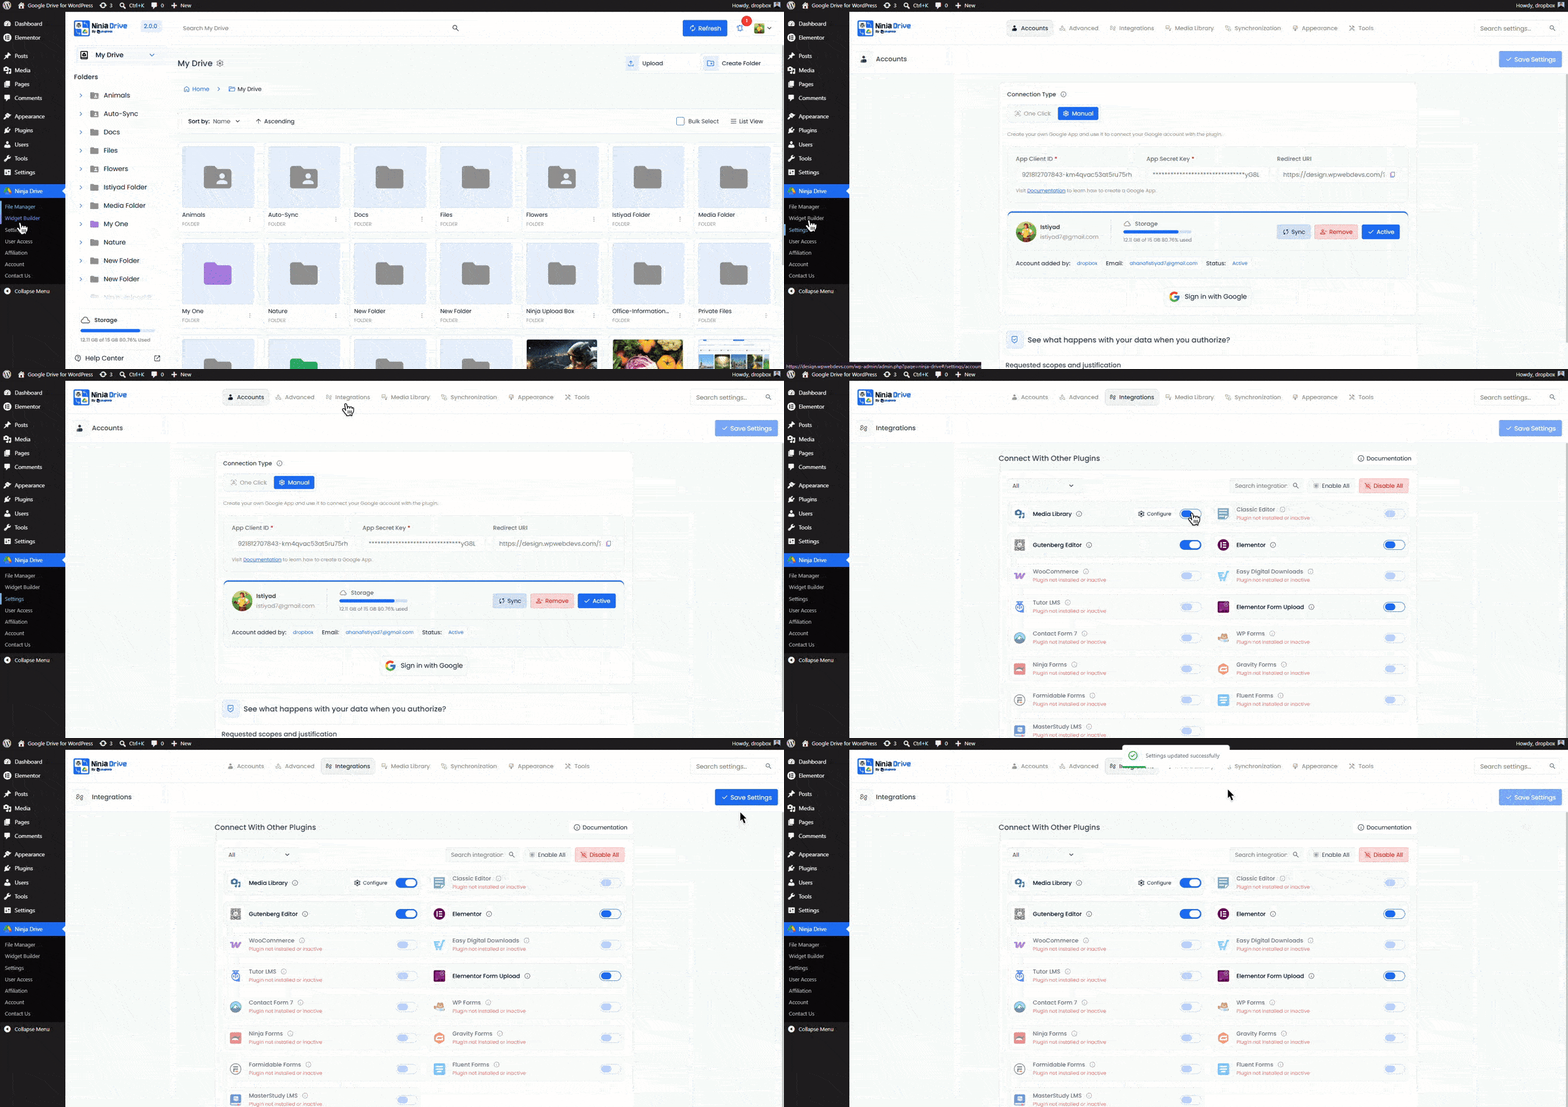
- In your WordPress admin, go to Ninja Drive → Settings.
- In the Settings panel, click the Integrations tab.
- Find the Media Library option and toggle it to Enabled. Click Save Settings.
Step 2: Configure the Media Library Integration
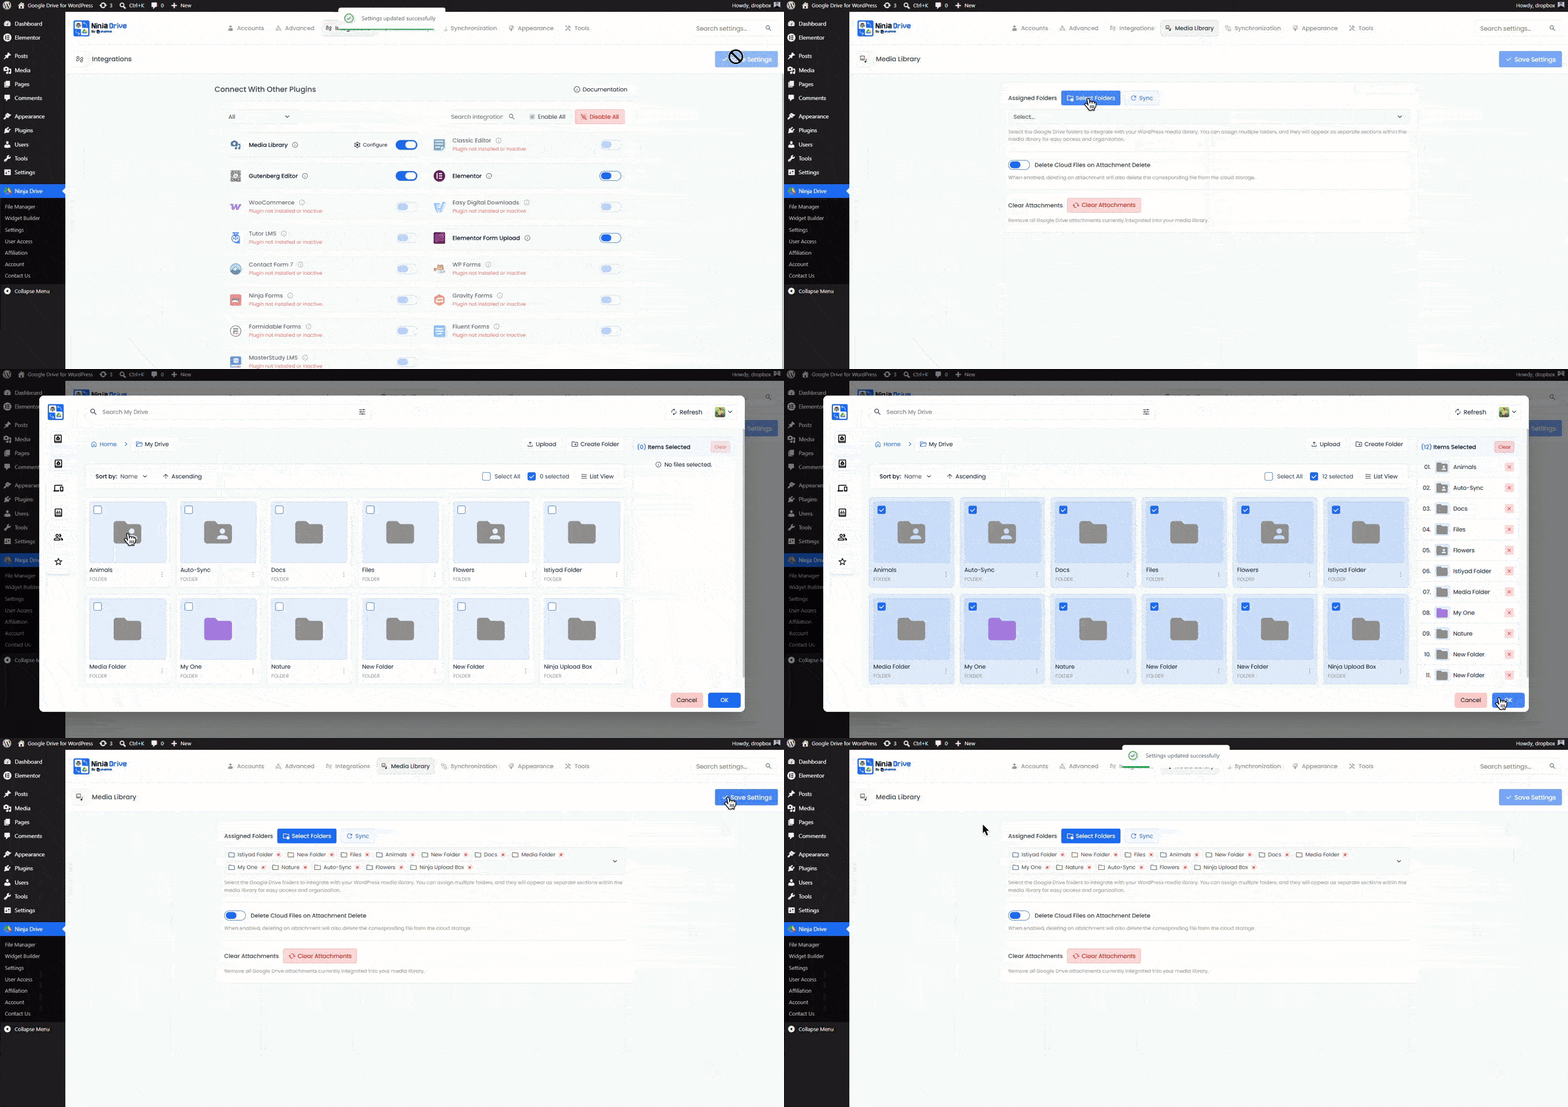
- From Settings → Media Library
- You will find assigned folders; click “Select Folders“
- A File Browser popup will appear. Select the folders you want to show in the media library.
- Then click “Ok“
Step 3: Verify the Integration
Open any post or page in the editor and click Add Media (Classic Editor) or the media inserter (Gutenberg). You will now see a Google Drive tab or option alongside the standard WordPress media tabs.
Related Docs
Ready to manage and display your Google Drive files directly from WordPress? Get Started with Ninja Drive

 Join Community