






How to Embed Google Drive Documents in WordPress Using Ninja Drive
The Embed Documents widget lets you embed Google Drive documents in WordPress — PDFs, Google Docs, Sheets, Slides, or presentations — inline on any WordPress page or post. Visitors read, scroll, and interact with documents without downloading them or leaving the site.
Supported Document Types
- PDF files
- Google Docs
- Google Sheets
- Google Slides / Presentations
- Microsoft Word (.docx), Excel (.xlsx), PowerPoint (.pptx) — Google Drive renders these in preview mode
Step 1: Open the Widget Builder
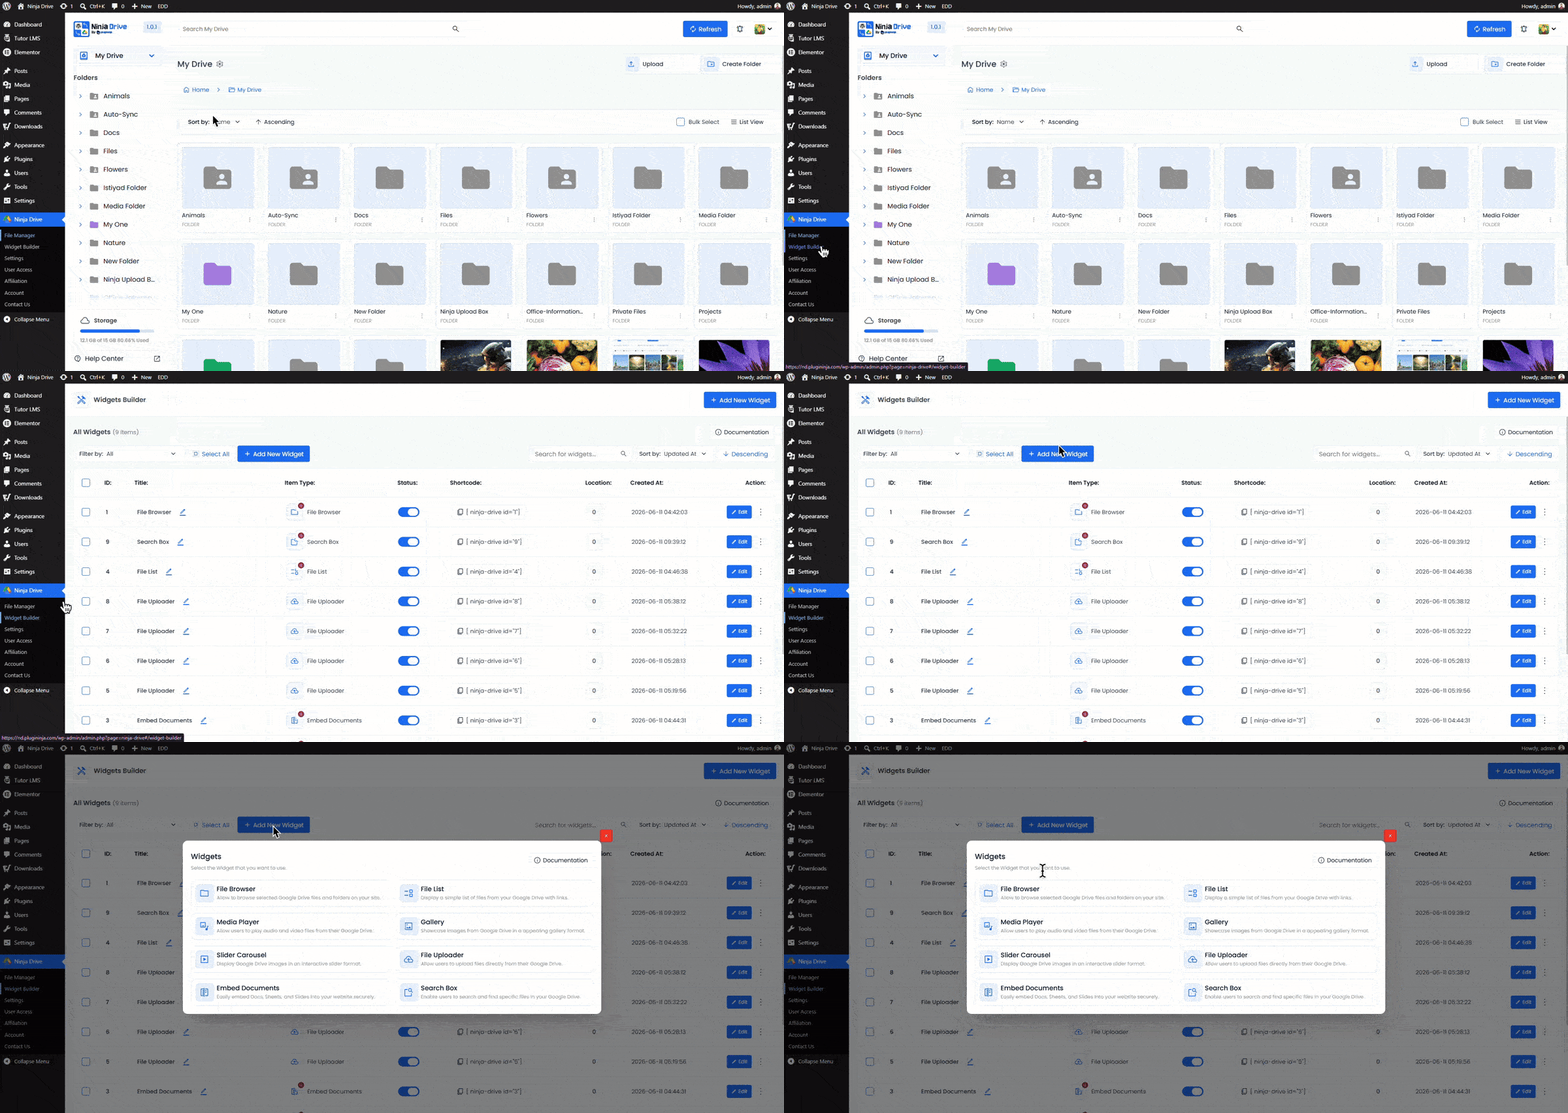
Go to Ninja Drive → Widget Builder in your WordPress dashboard.
Step 2: Add a New Widget and Select “Embed Documents”
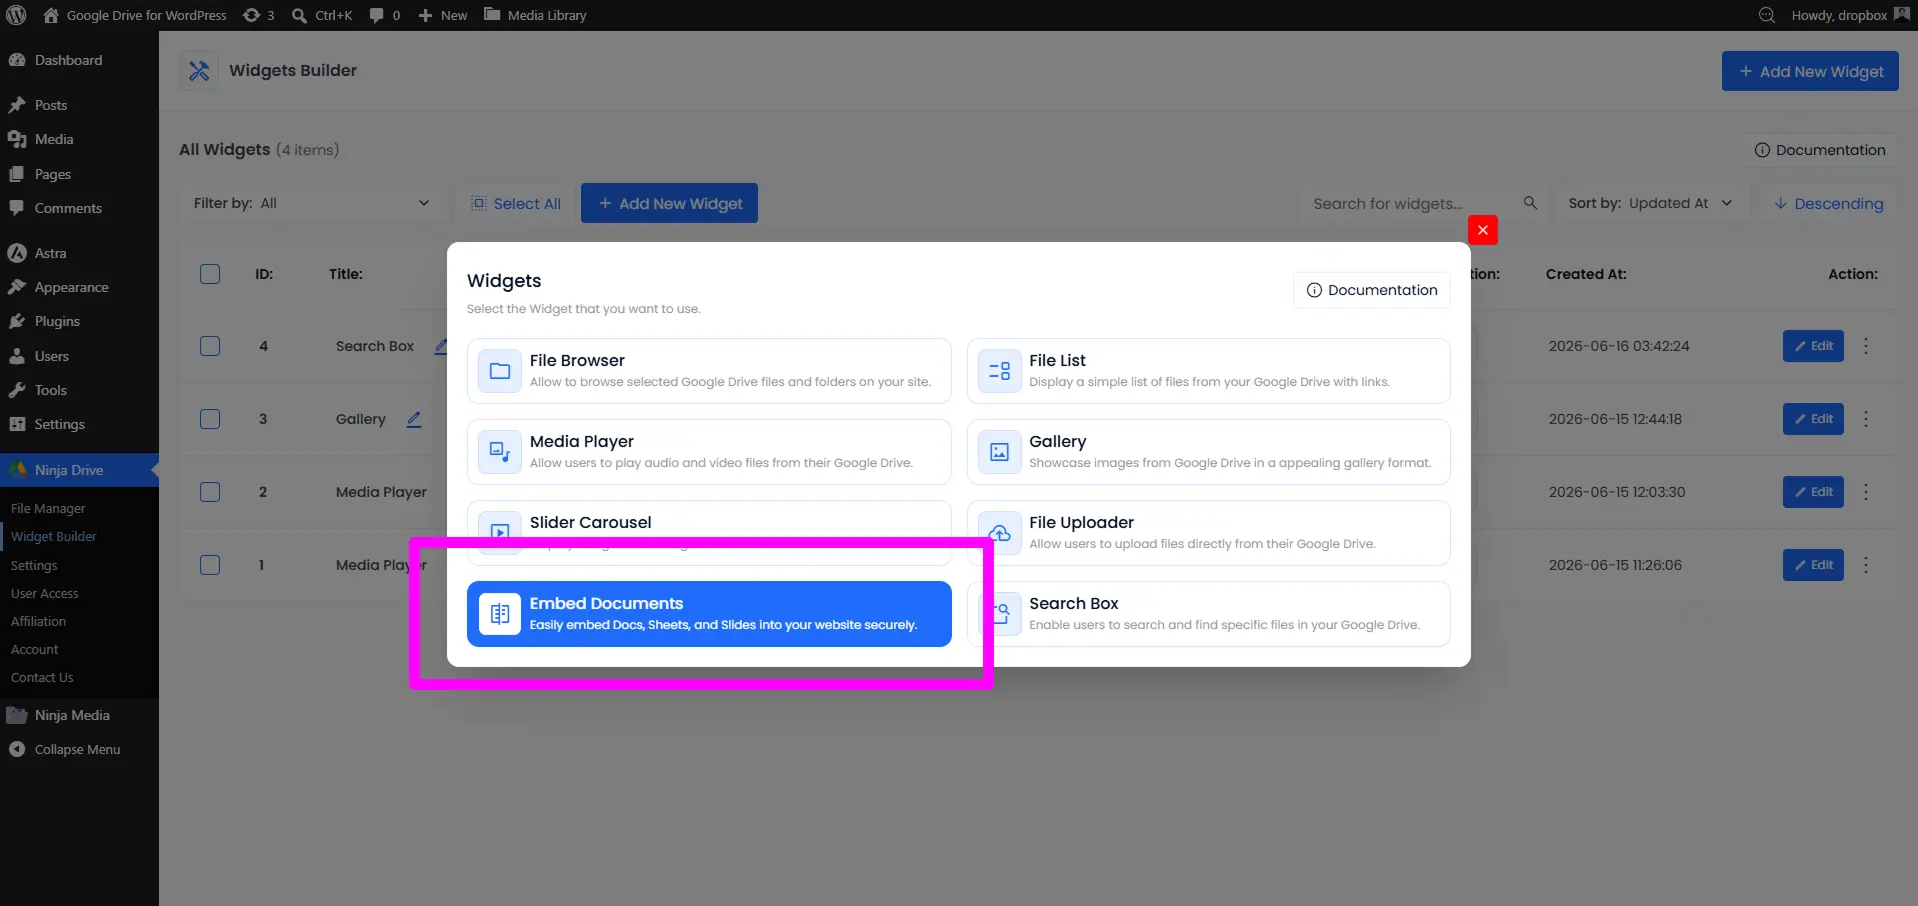
Click Add New Widget, then select Embed Documents from the widget type selector.
Step 3: Select Source From Google Drive
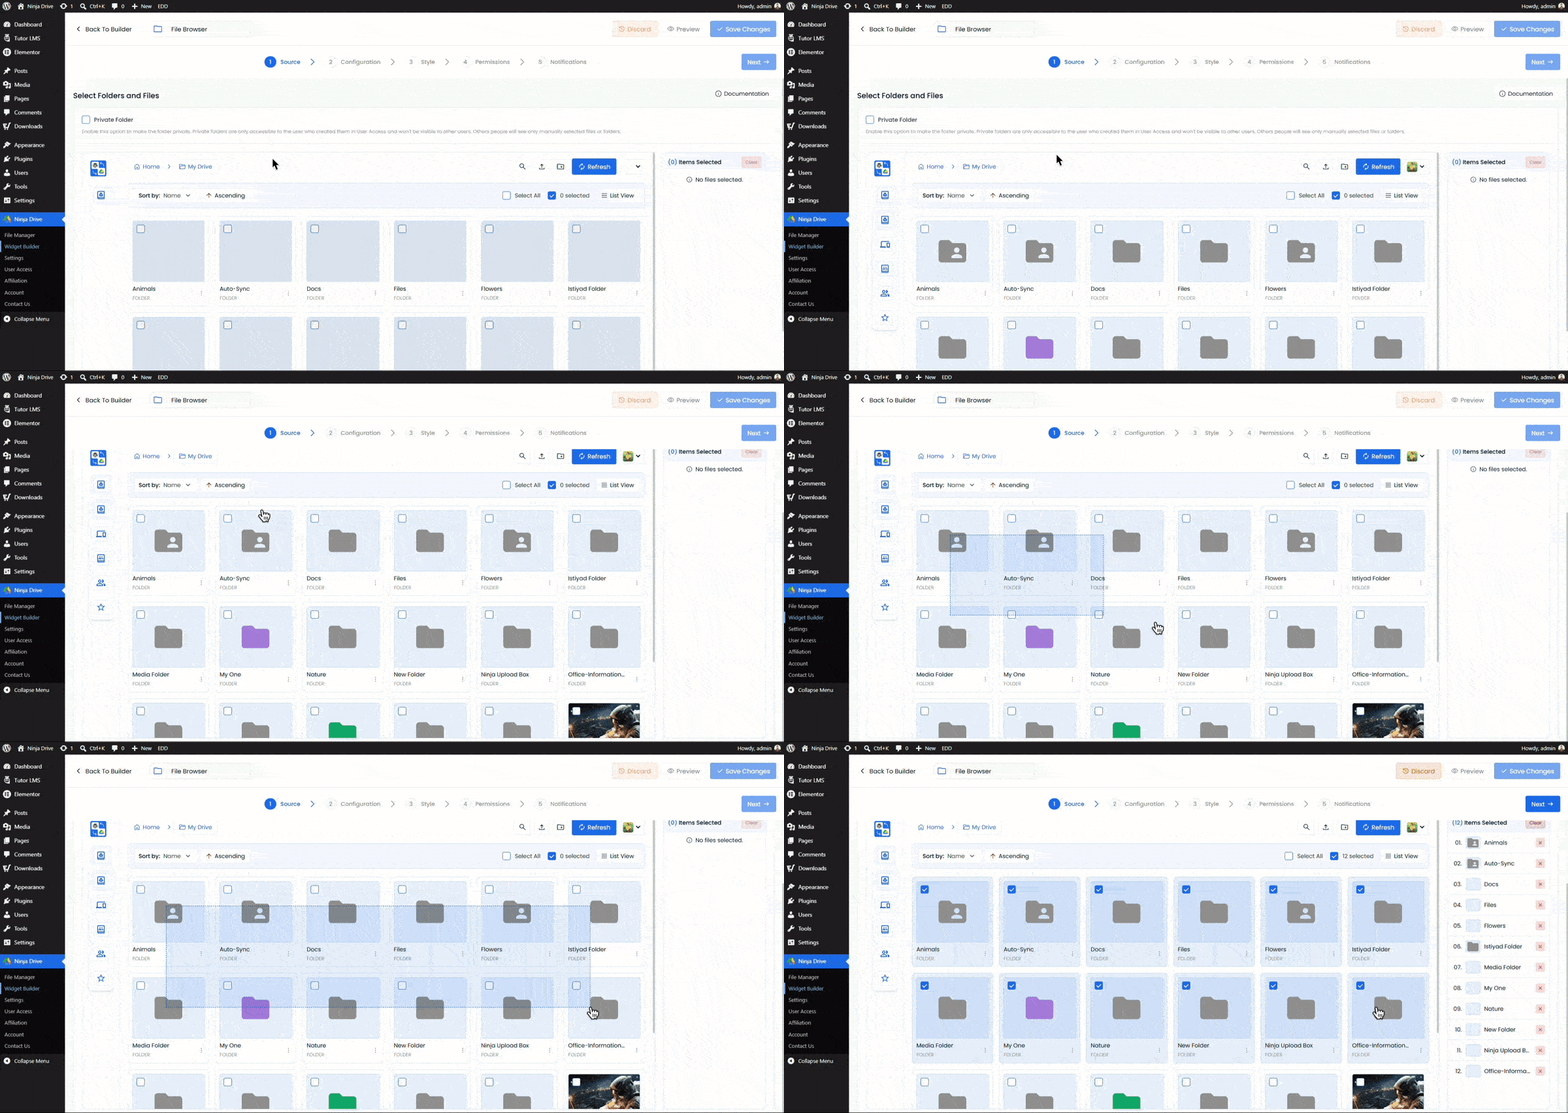
After selecting the Embed Document, you will land in the source tab. From here, select the file & Folders that you want to show in the Embed Document.
Step 4: Configure the Embed Settings
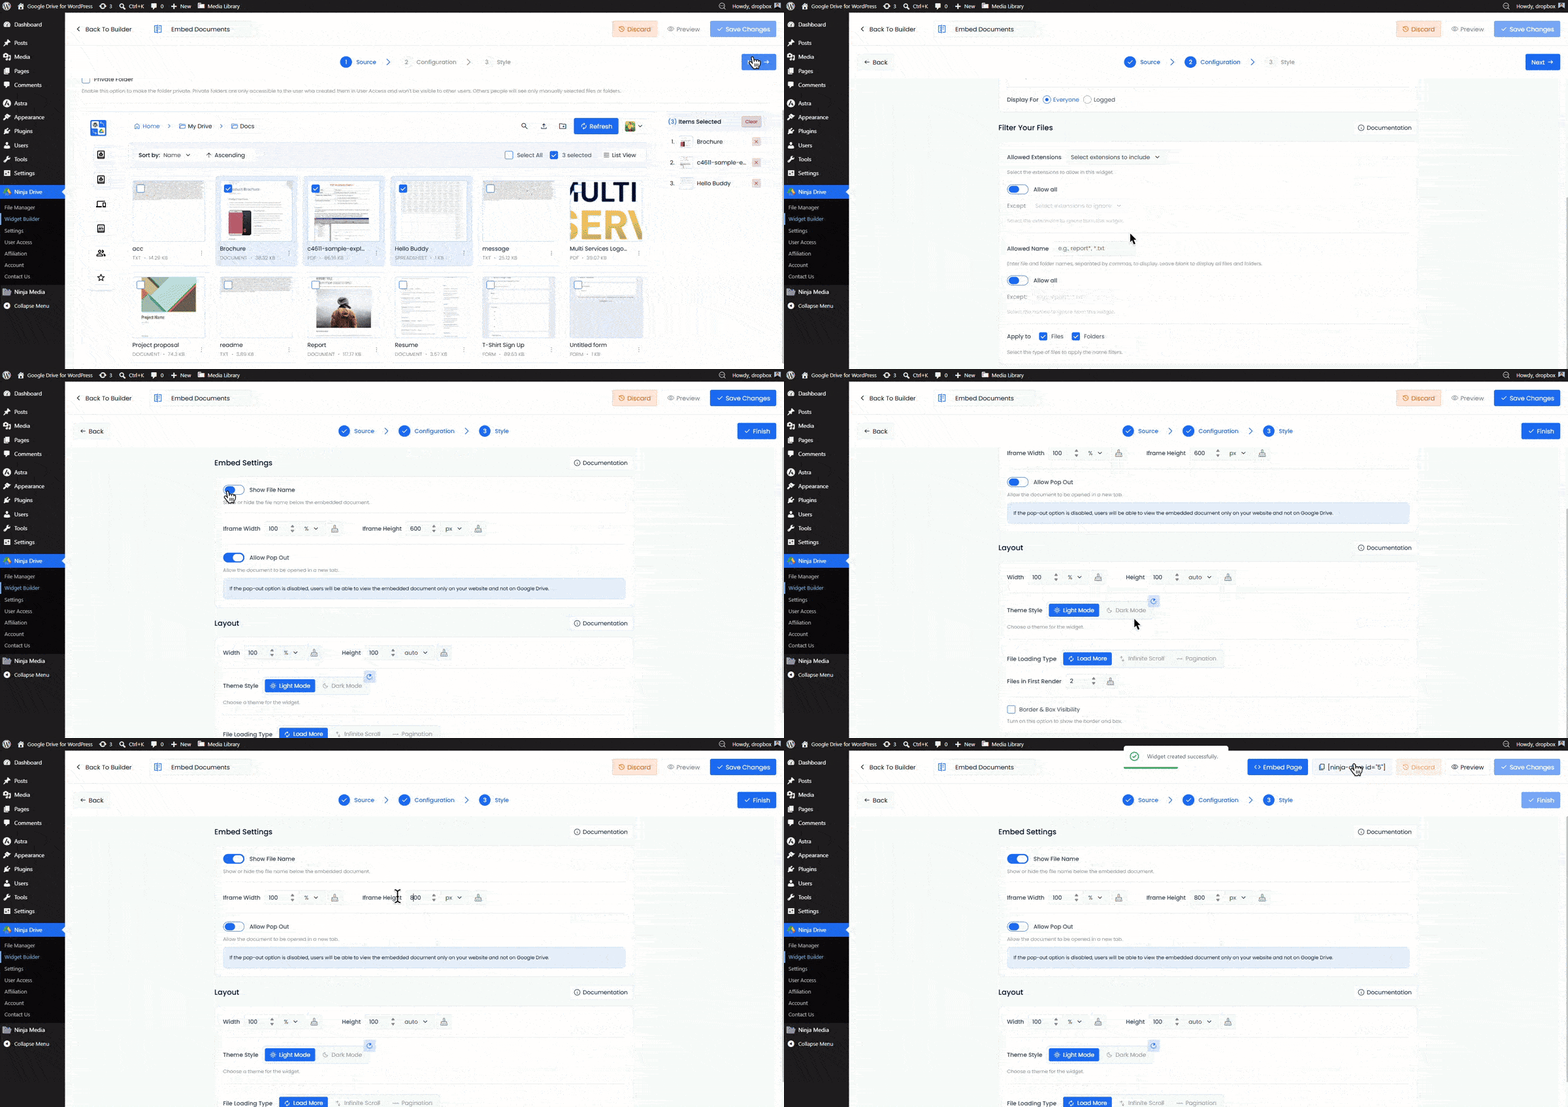
Configuration Tab
- Automatic File Fetching: Turn on this option to fetch new files automatically
- Password Protection: Set any password for the widget.
- Filter Your File: You can filter all your selected files, which will show or which will not.
Style Tab
- Show File Name: Show or hide the file name of the embedded document.
- Sizing: Iframe Width & Iframe Height
- Allow Popout: Allow the document to be opened in a new tab.
- Layout: Configure the gallery layout, including image dimensions and other display settings, such as the number of images to show on initial load.
Step 5: Save and Copy the Shortcode
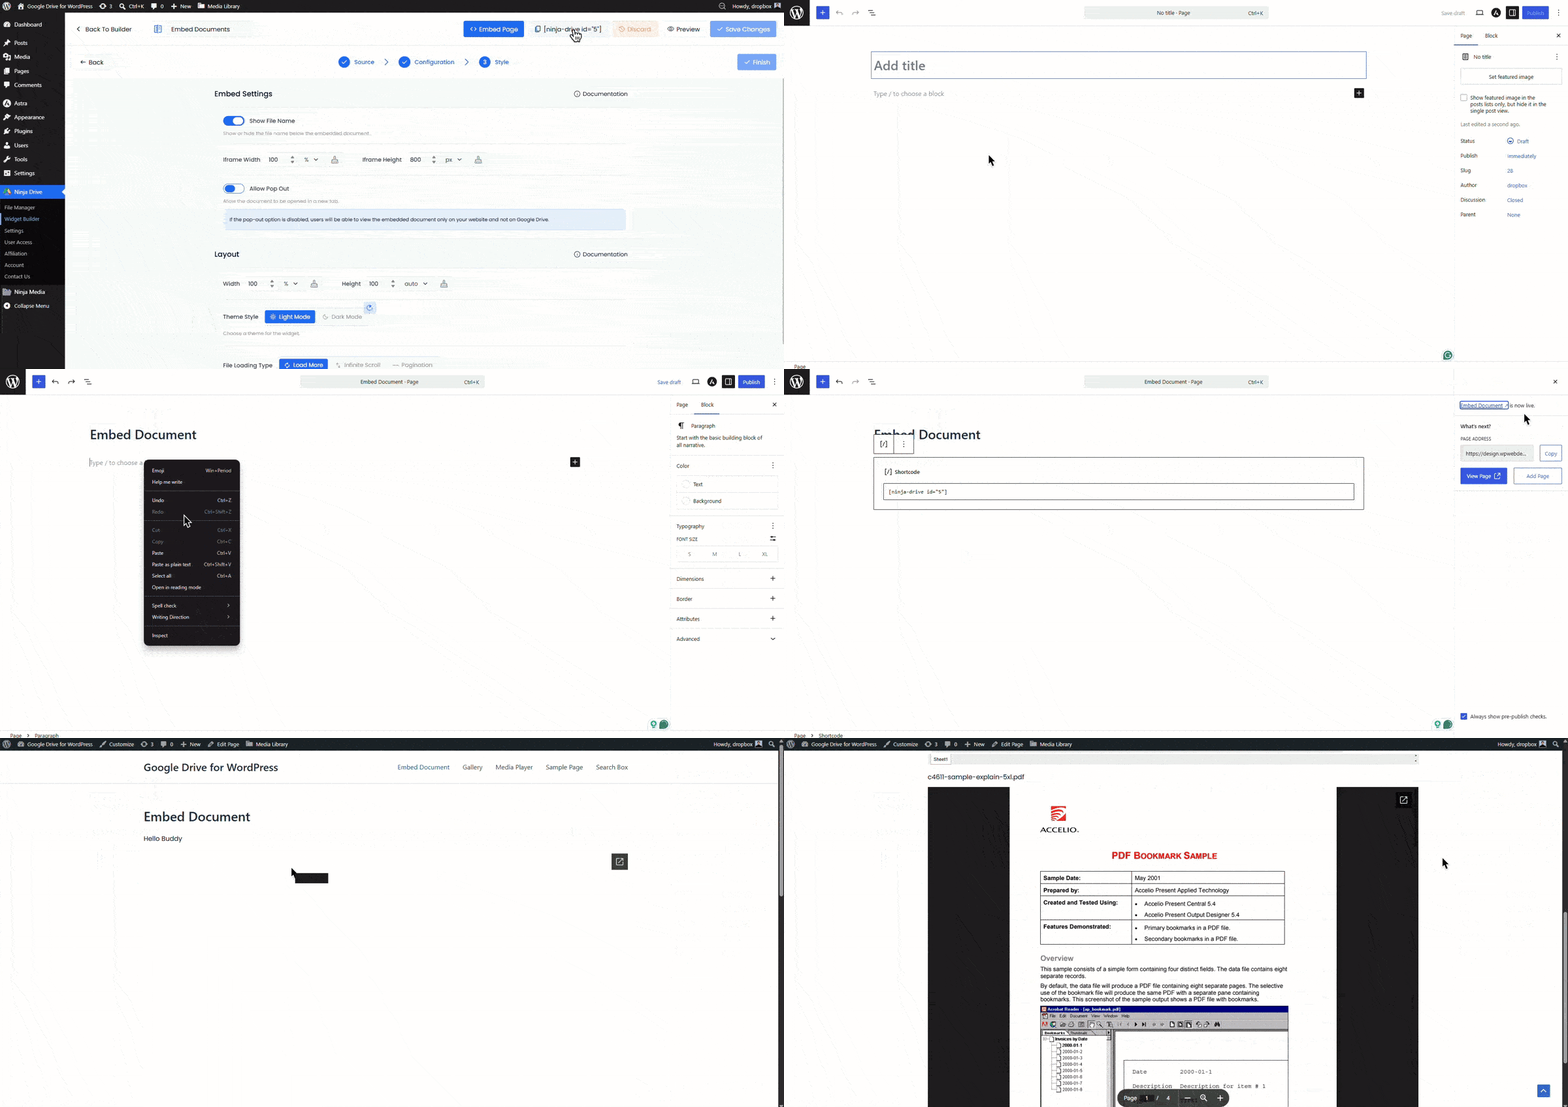
Click Save and copy the shortcode:
[ninja_drive id="5"]Step 6: Embed on a Page or Post
Paste the shortcode into any Gutenberg Shortcode block, the Classic Editor text view, or an Elementor Shortcode widget. The document renders inline immediately when the page loads.

 Join Community