




How to Link Your Google App with the Ninja Drive Plugin?
The Ninja Drive WordPress plugin allows you to connect your site to Google Drive. By default, the plugin uses its own Google App for authentication. However, you may prefer to use your own Google Cloud app for greater control and to address organizational or security requirements. This guide provides step-by-step instructions for creating a Google Cloud project, configuring OAuth credentials, and linking your custom Google app to the plugin.
Step 1: Prepare the Plugin for a Custom Google App
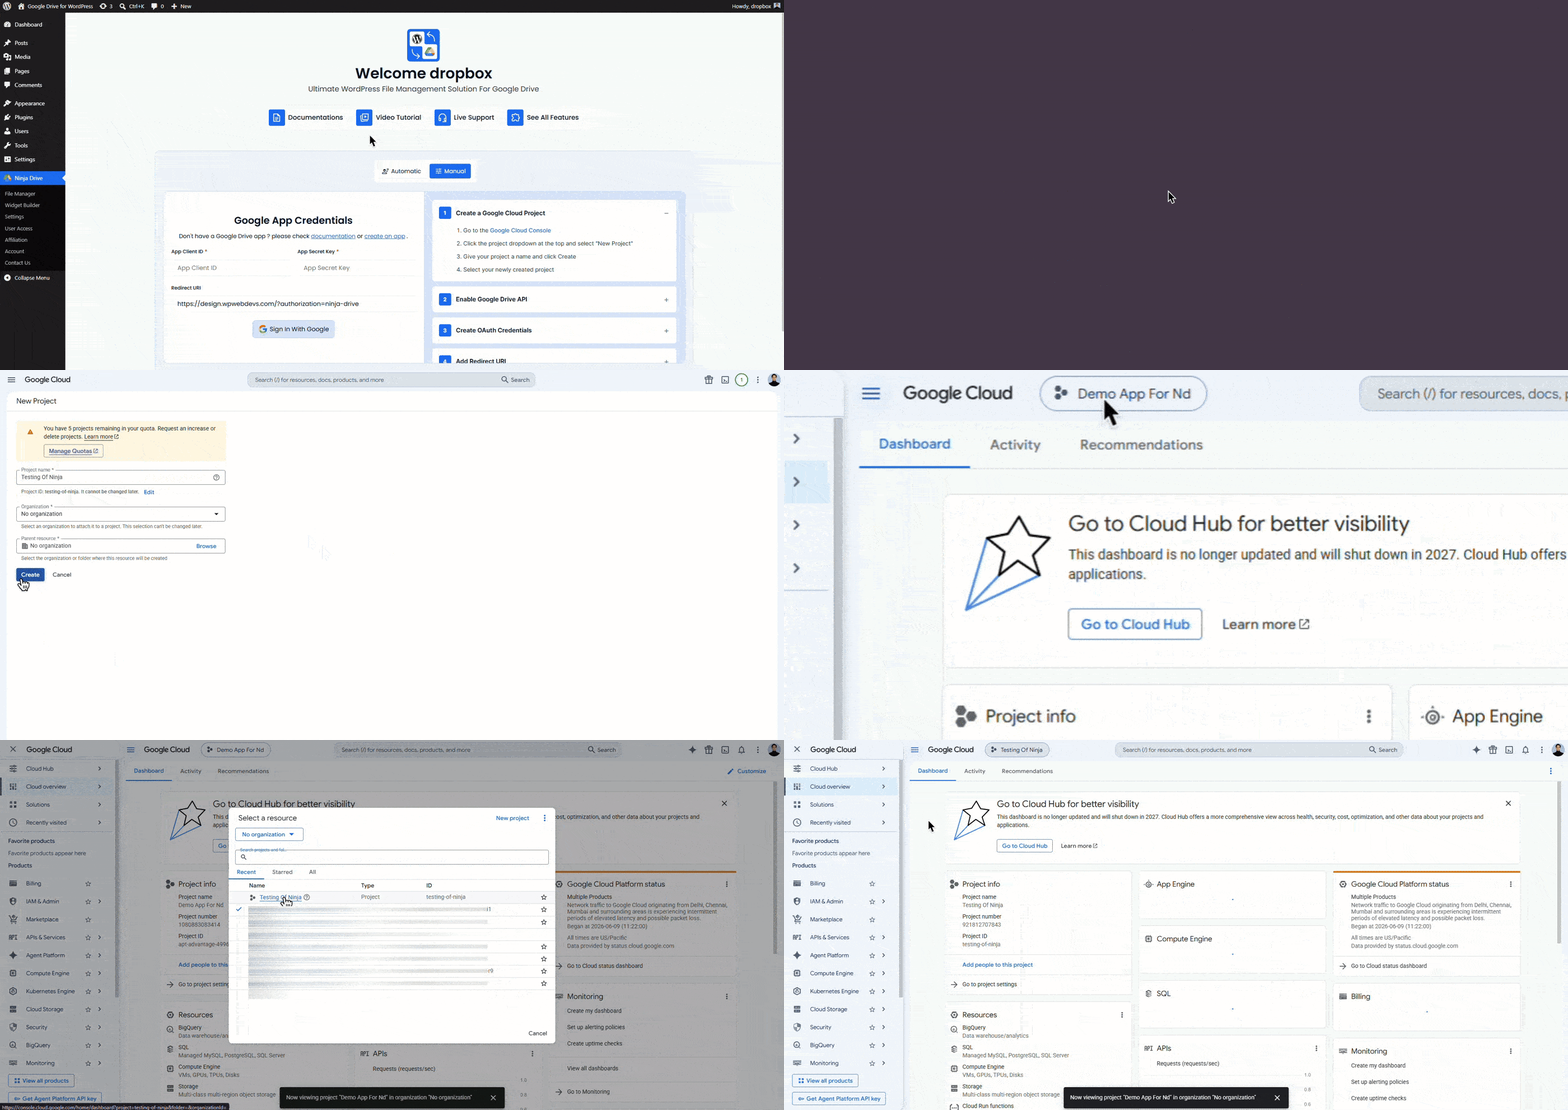
- Go to Ninja Drive > Settings > Accounts.
- Select Manual under Connection Type
- Copy the “Redirect URL“
- Click on “Create an app link“
- Then set a unique Google Cloud project name and click “Create“
Step 2: Enable the Google Drive API
- With your new project selected, go to APIs & Services > Library.
- Search for “Google Drive API,” click on it, then click “Enable”.
- This allows your app to interact with Google Drive.
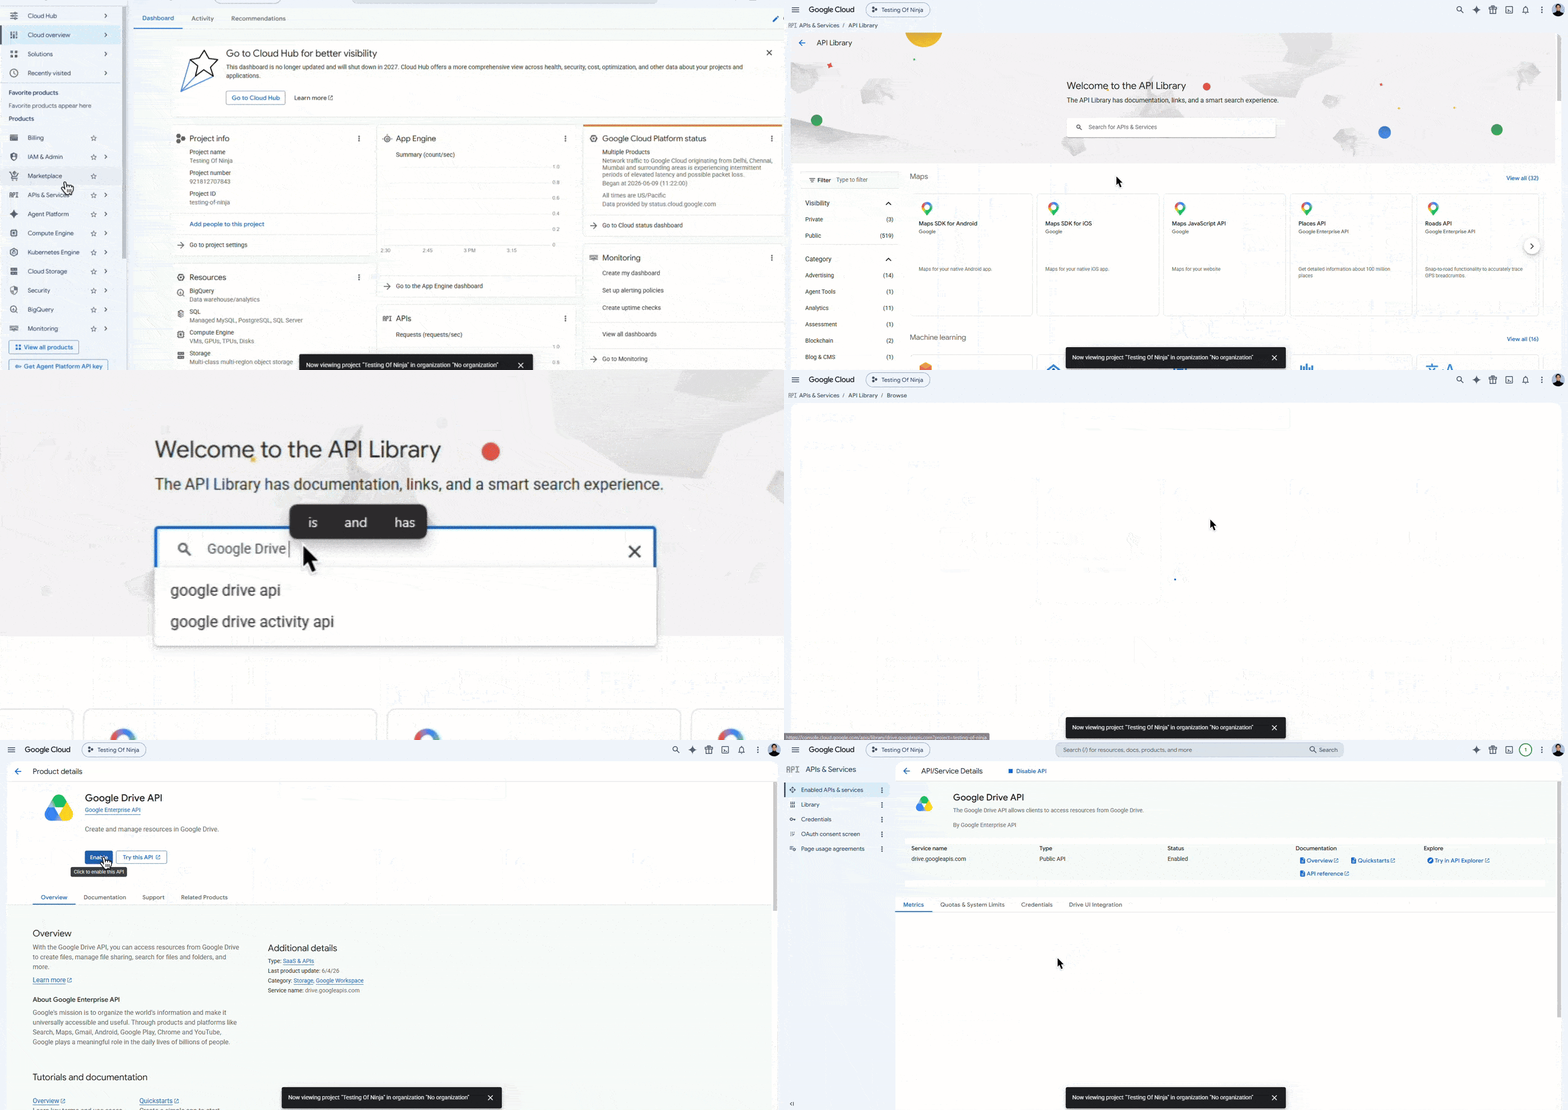
Step 4: Configure the OAuth Consent Screen
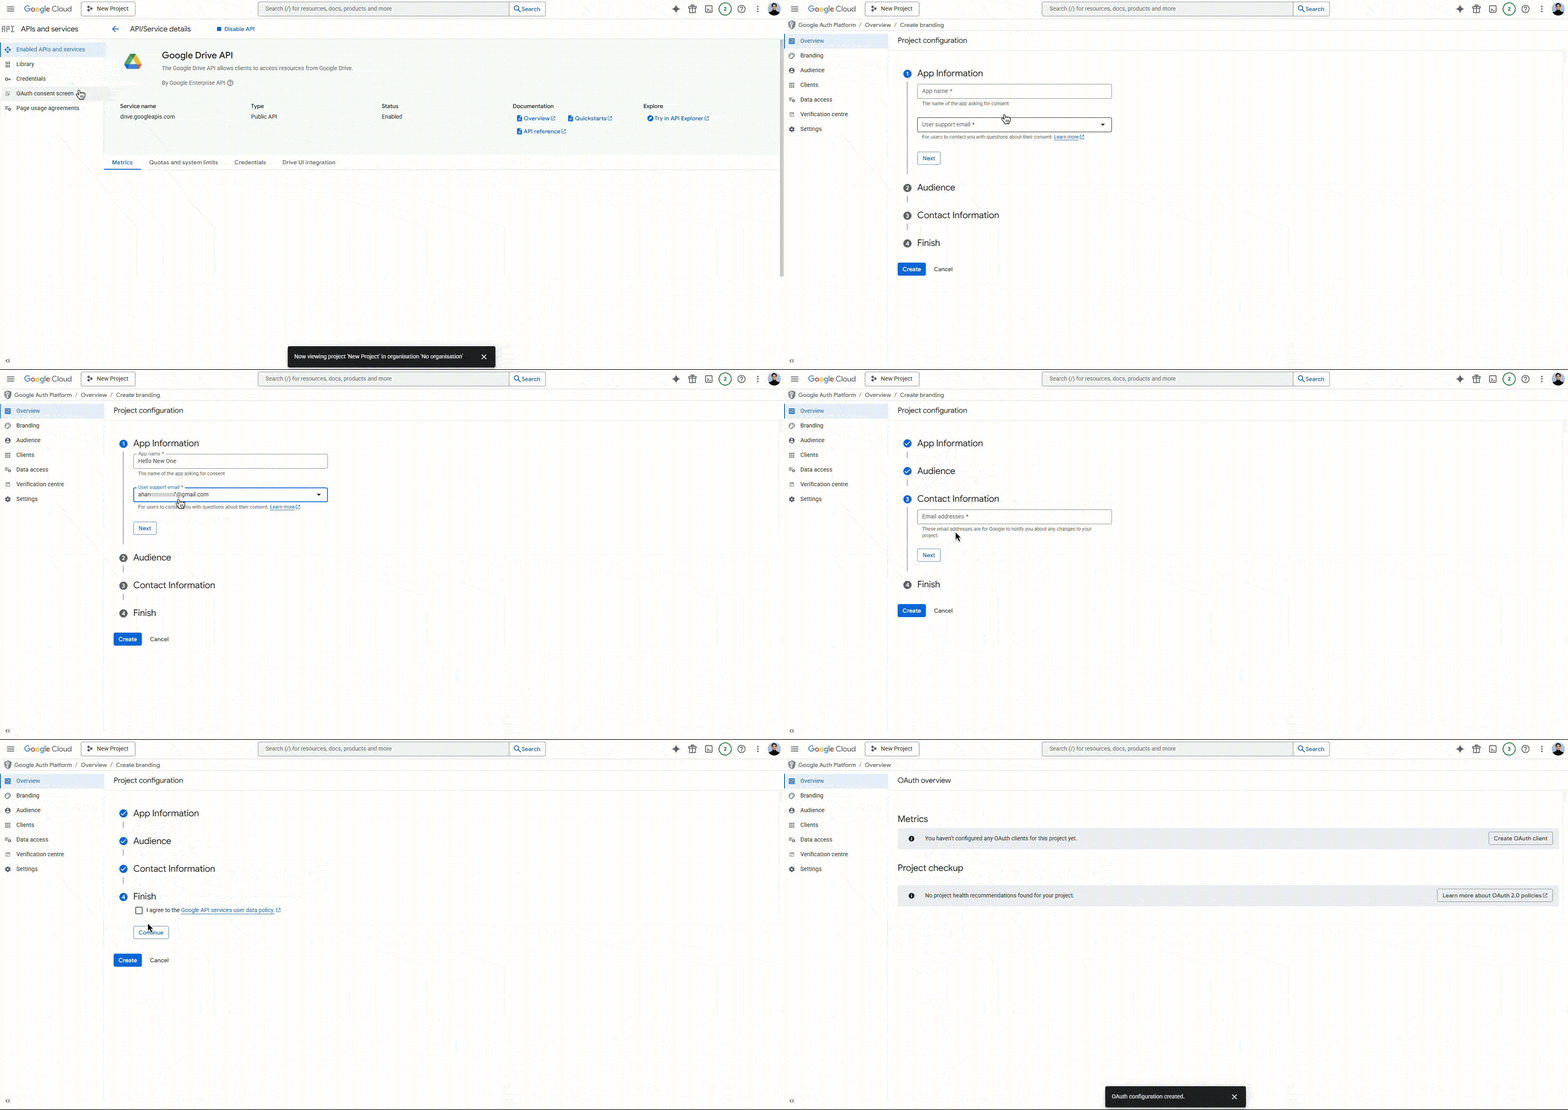
- Navigate to APIs & Services > OAuth consent screen. Click the “Get Started” Button:
- App name: Your app name (e.g., “My WP Ninja Drive Plugin”)
- User support email and Developer contact email
- Under Audience, select External. Click Next.
- Under Contact Information, enter the Gmail that you want to sign in with, then click Next.
- Under Finish, agree to the Google User Data Policy.
- Click Continue > Create.
Step 5: Add Scopes for Google Drive
- Go to the Data Access tab
- Click Add or Remove Scopes
- Search for Drive and select the scope:
https://www.googleapis.com/auth/drive - This grants full access to your Google Drive files
- Click Update, then Save and Continue
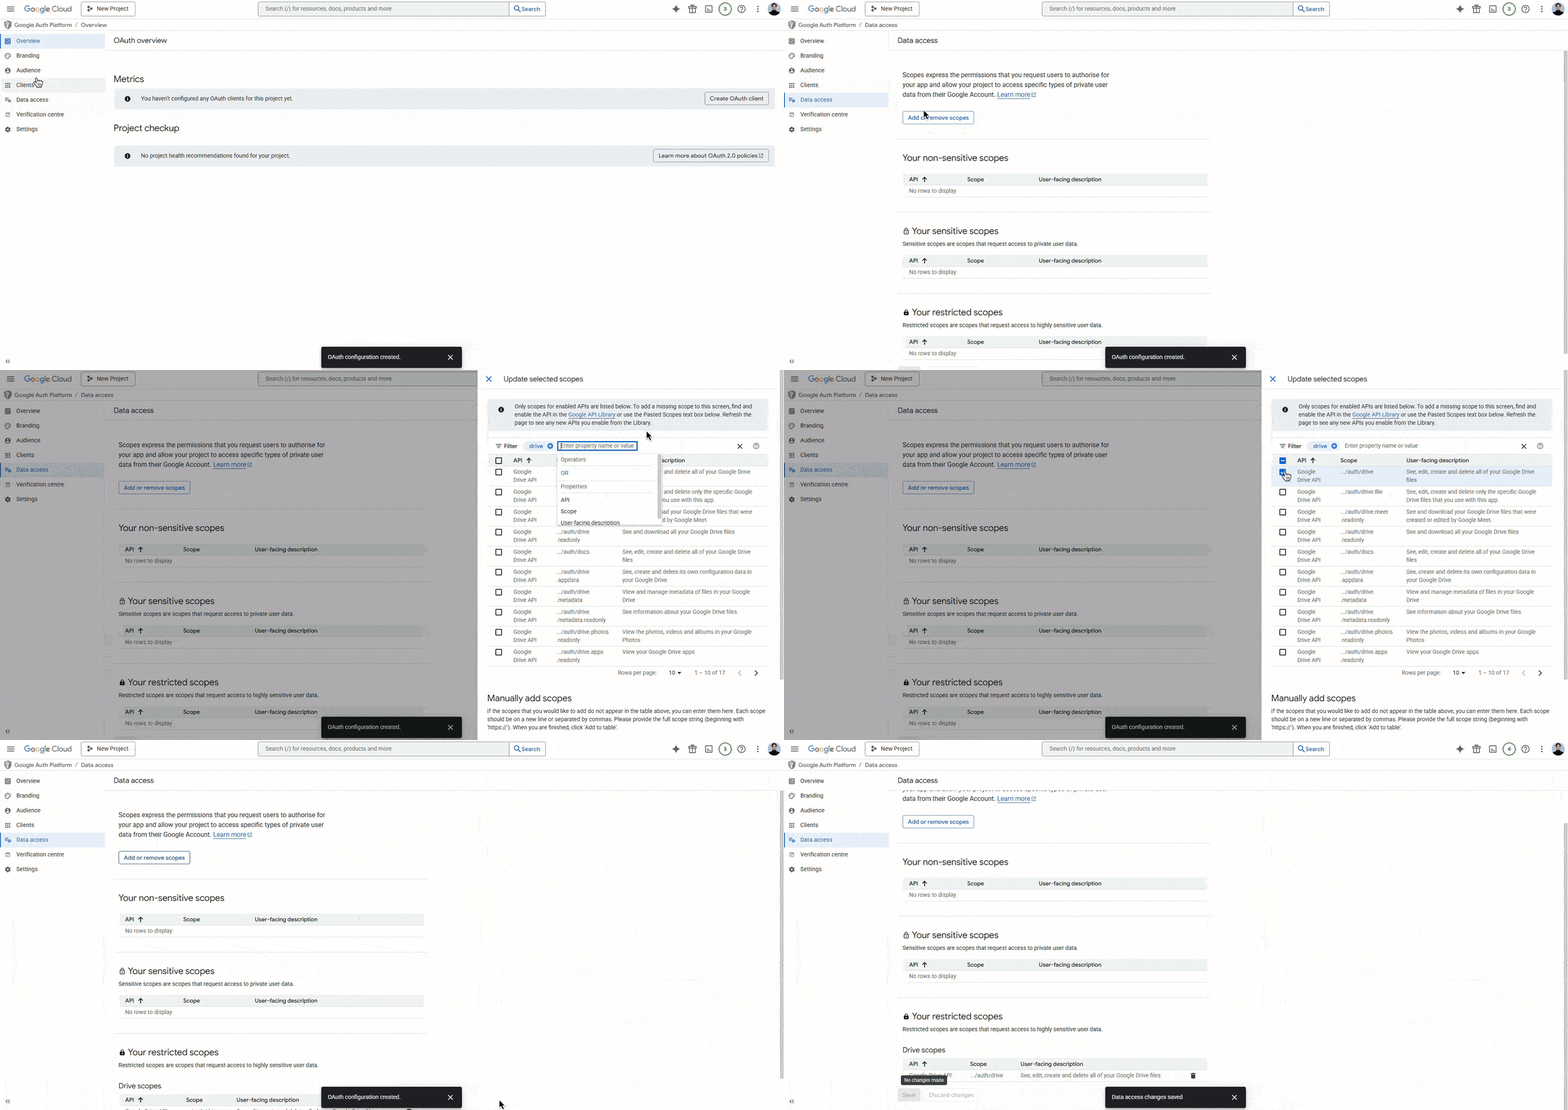
Step 6: Create OAuth Client ID Credentials
- In the Google Auth Platform, click Clients
- Click “+ Create Client”
- In the Application type dropdown, select Web application
- Update the Name of your OAuth client to help identify it, e.g., “WordPress Ninja Drive Client.”
- In Authorized redirect URIs, paste the URI from Step 1, e.g.,
https://yoursite.com/?authorization=ninja-drive(Or copy it from the Ninja Drive login page. ) - Click Create to generate credentials
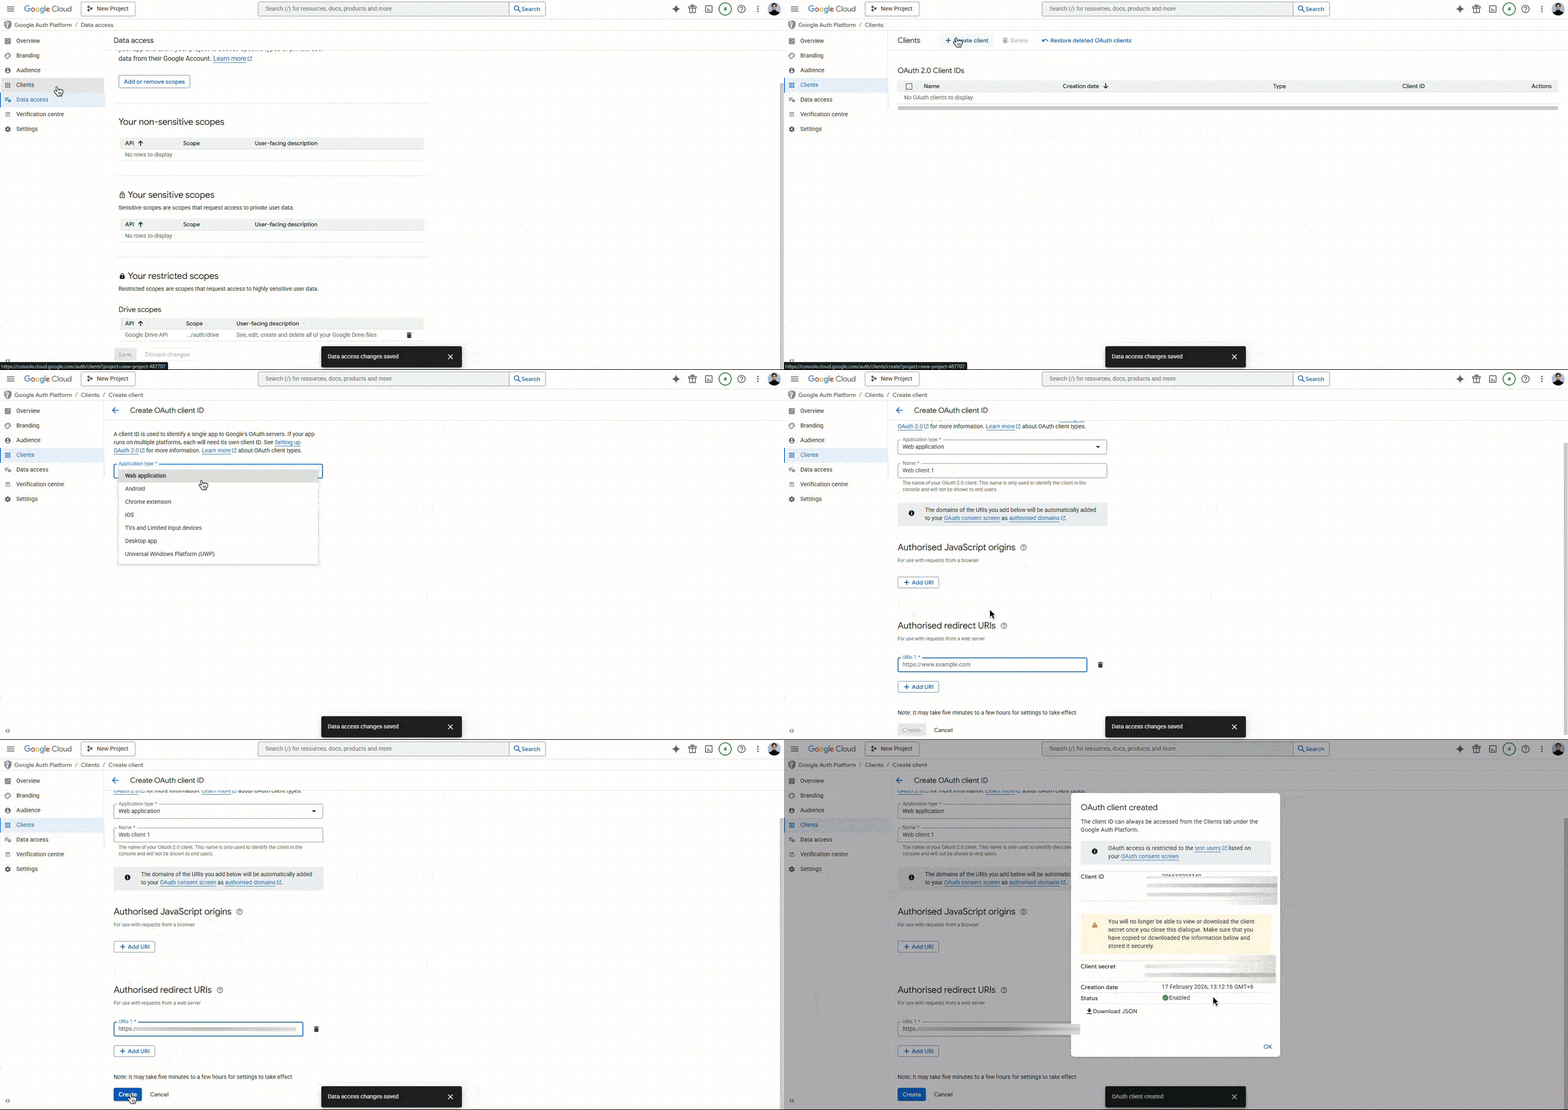
Step 8: Get Your Client ID and Client Secret. Enter Credentials into the Ninja Drive Plugin
- Click the OAuth 2.0 Client you created
- Copy your Client ID and Client Secret.
- Return to Ninja Drive > Settings > Accounts in your WordPress admin.
- In Manual mode, paste the Client ID and Client Secret into their respective fields.
- Leave the Authorized Redirect URL unchanged.
- Click Save Changes.
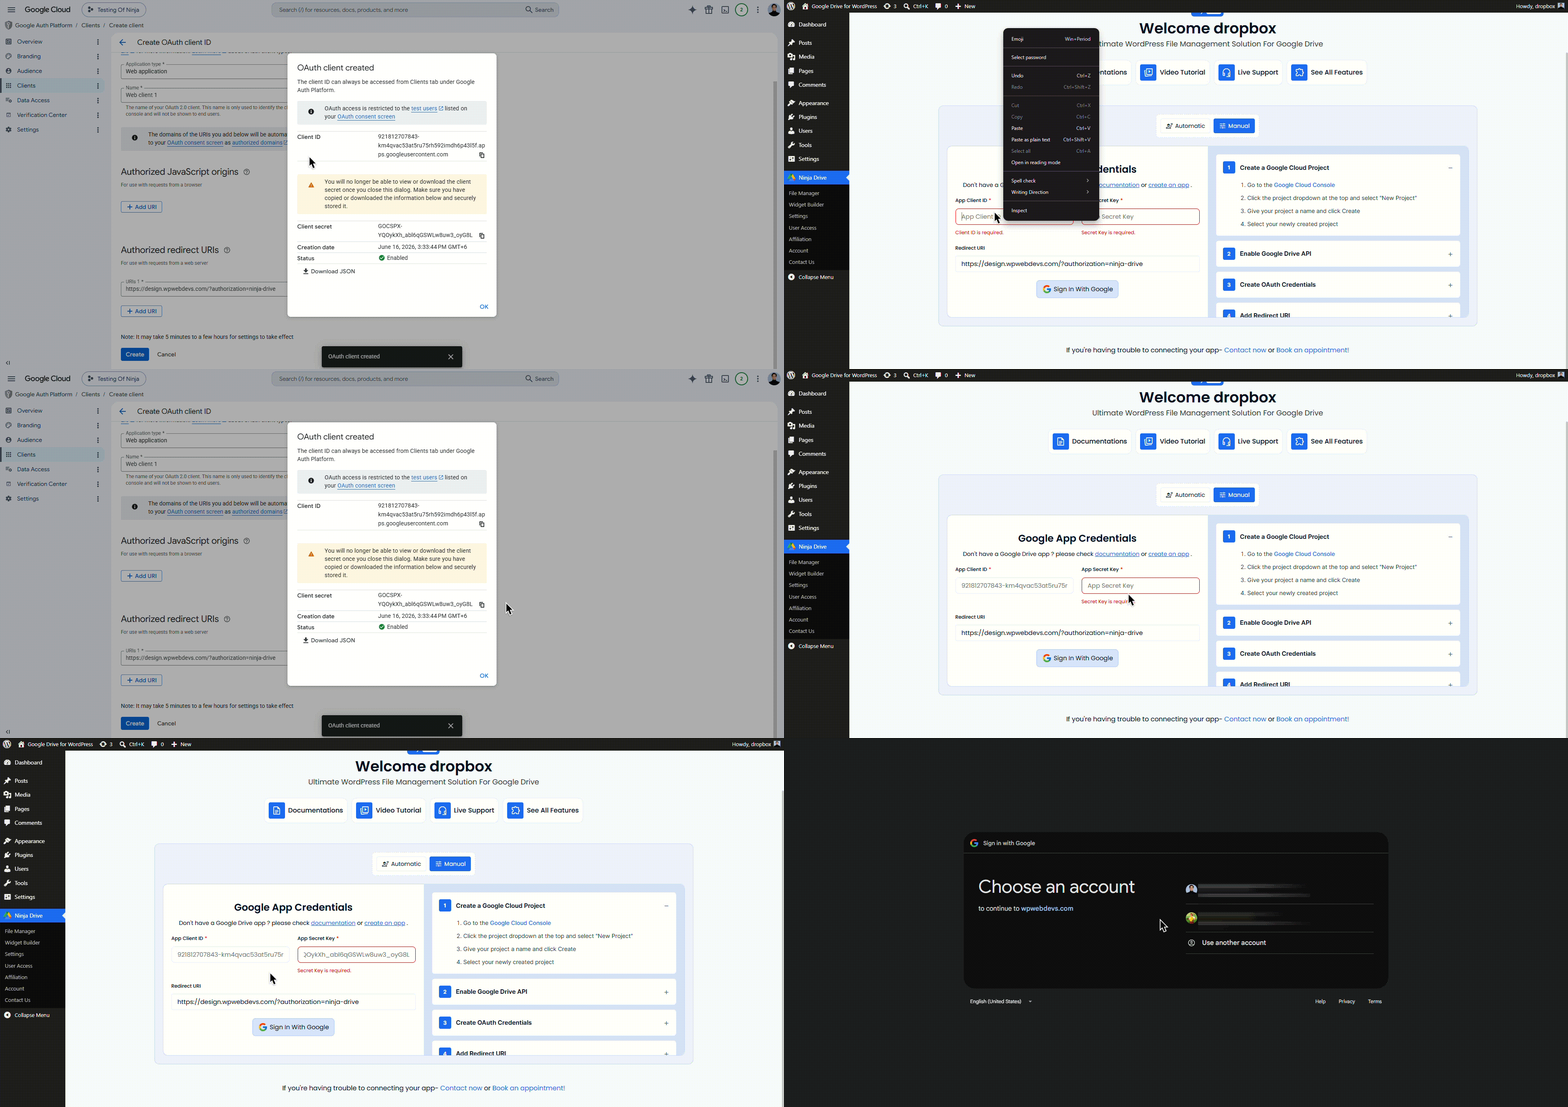
Step 9: Connect Your Google Account using the New App
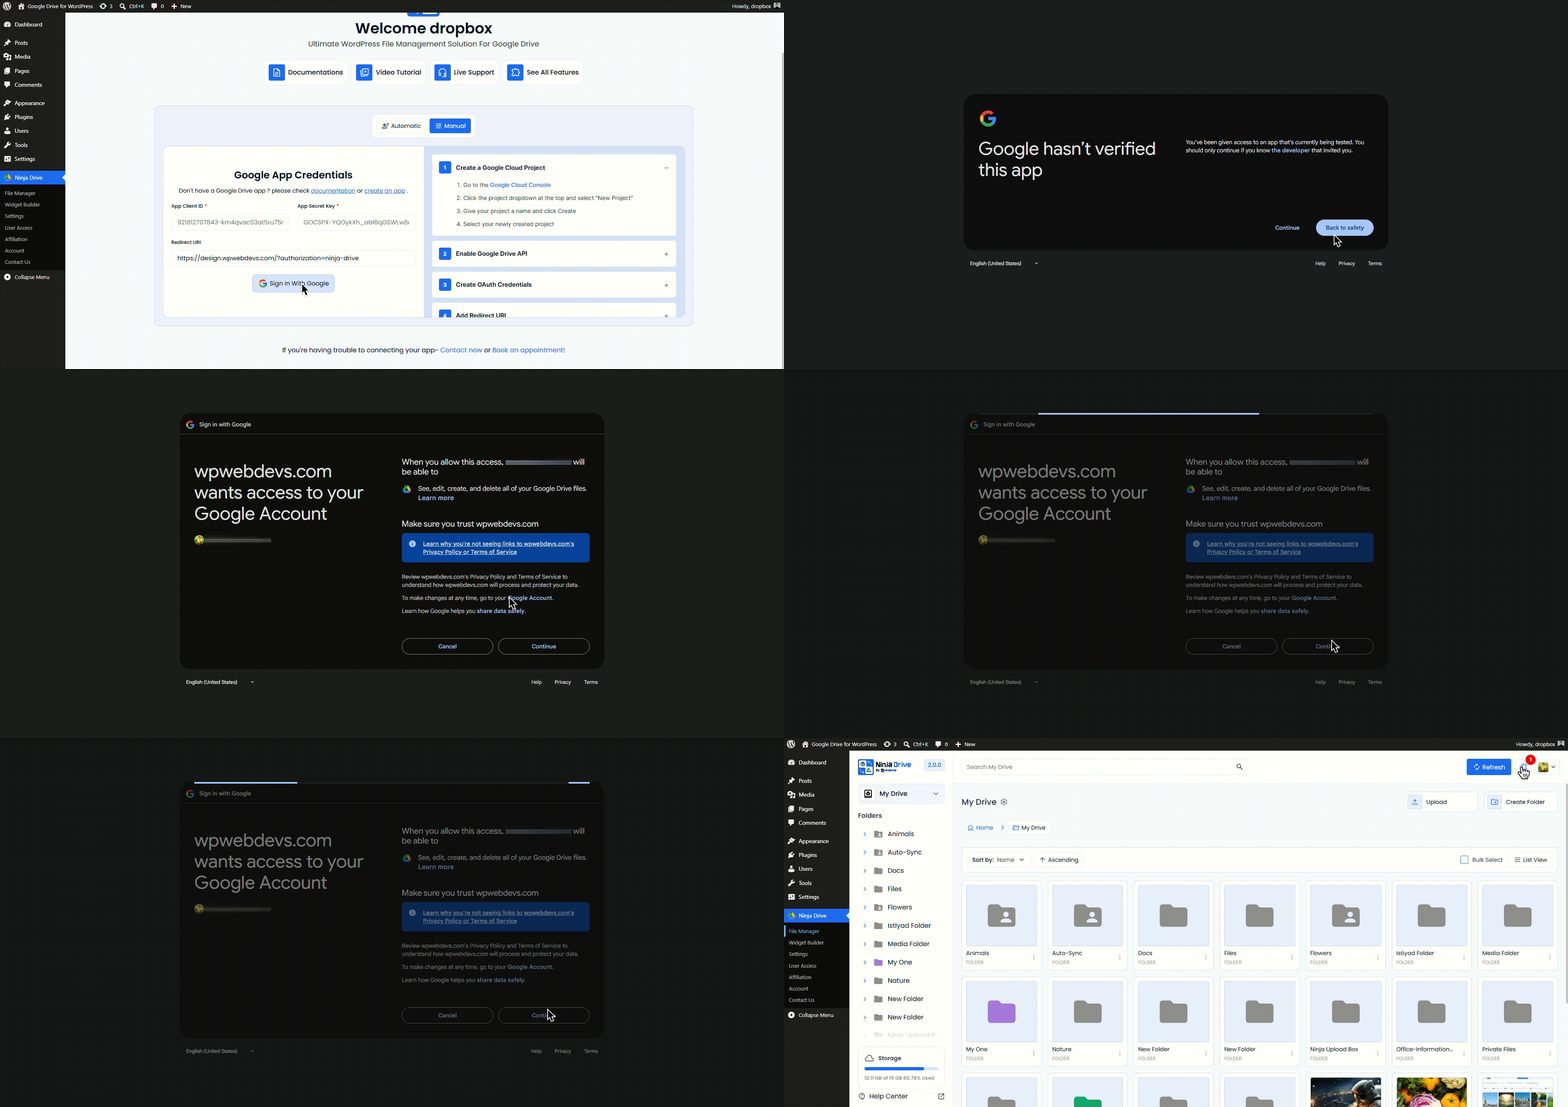
- And click Sign in with Google.
- A Google login window will open. Log in, review the consent screen, and allow access.
- If in testing mode, click “Continue” → “Continue”.
- After connecting, your account will appear in the Ninja Drive dashboard
Note: Keep credentials secret: Never share your Client ID or Client Secret.

 Join Community